

Paperless Court of Examiners via Microsoft Teams
Microsoft Teams is sometimes used for conducting online paperless Court of Examiners.
If you are an external examiner and require access to Microsoft Teams in Trinity College, the following items must be completed first:
- Trinity computer account
- The nominating Trinity School or Department must request a Trinity computer account on your behalf from the Trinity Human Resources department. If this hasn't occurred, please contact your nominating School or Department
- After your account application is processed, you will receive an email, from hr@tcd.ie, with a password-protected PDF. This PDF will contain your Trinity account username and a password. If you do not receive your new account details, please contact the Human Resources department
Once the above items are in place, you will be able to sign in to Microsoft Teams, via office.tcd.ie, using your Trinity computer account.
Passwords associated with computer accounts in Trinity college expire every 180 days (approximately 6 months).
If you have not used your computer account since the last external examination process, then there is a good chance that your password will have expired and will need to be changed before you can access the Trinity systems again.
Please see Password expiration on computer accounts for more details.
Creating and setting up the Team
Important Guidelines for setting up a Team site
- Teams names will be created with the prefix 'TCDGroup-'
- Teams should always be created as 'Private'
- Each Team should have two owners so that more than one individual can manage the Team, e.g. adding members
- The college reserves the right to remove any Team with an inappropriate or misleading name
- An expiry of one year will be set on all Teams. Owners (or administrators) will have the option to renew the Team to retain it after 1 year and will be emailed with a renewal option 30, 15, and 1 day(s) before expiry
- Schools and departments should coordinate locally to ensure that multiple team sites are not setup for the same purpose.
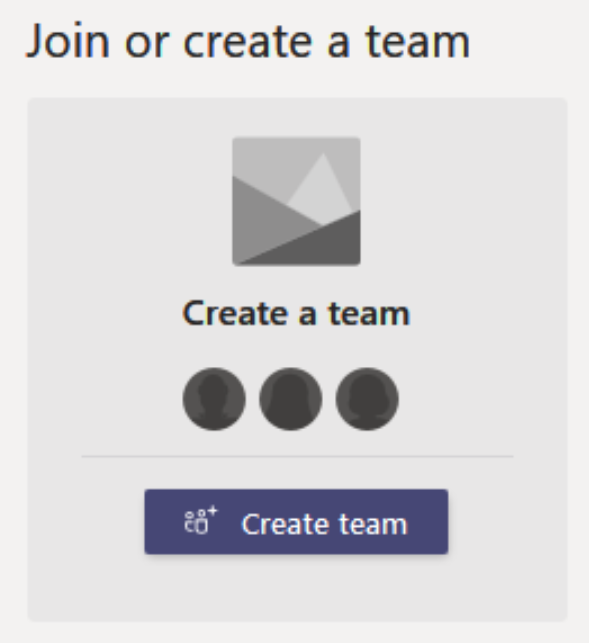
Create your Teams site
- Log into office.tcd.ie in a web browser
- Click on the Teams app

- Click Join or create a team

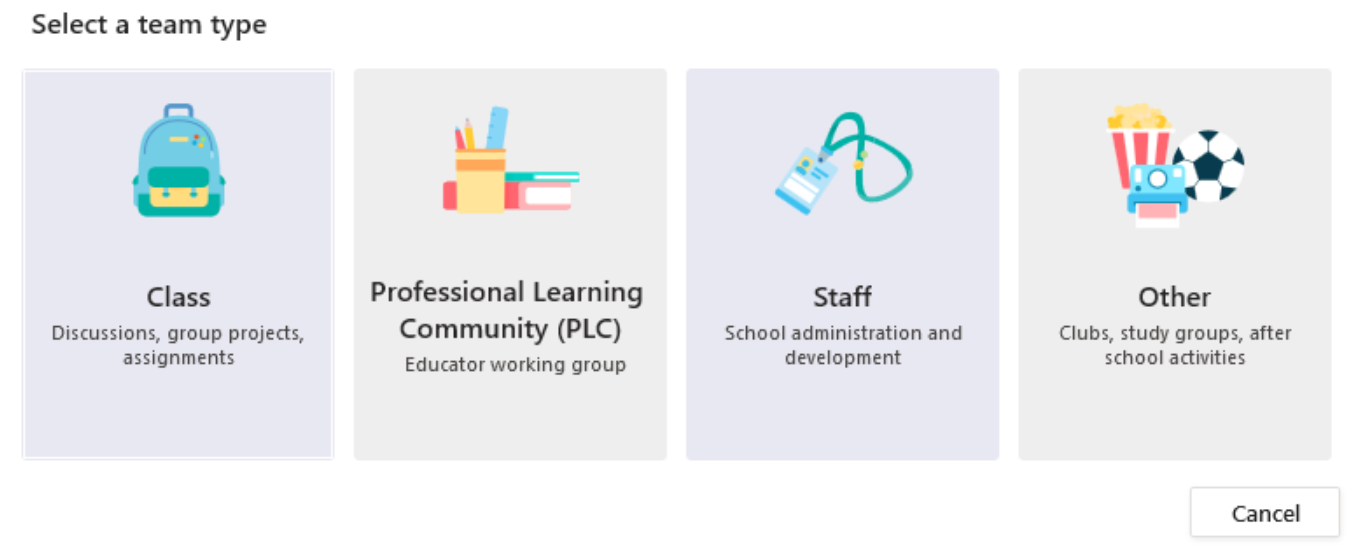
- Click Create a team
- Click on Staff
- Enter your Teams details:
* Type a name for your team
* Under Privacy select Private (only Team Owners can add members)
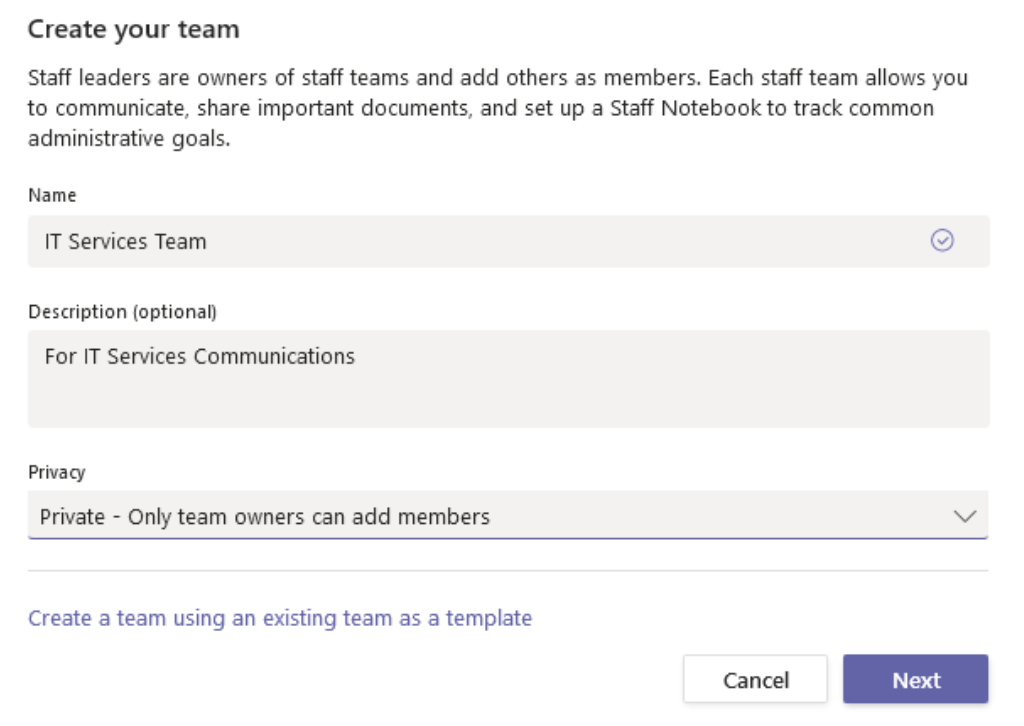
- Click Next
Managing your Team and Team membership
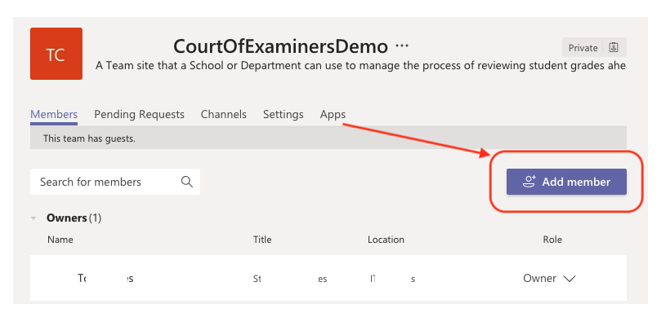
Adding a member to your Team from Trinity
- From the drop down menu select “Manage team” and then click on ‘Add member’
- Type in the name or the Trinity username of the person you want to add to the Team. When the person you want to add appears underneath, click on that person and you can then click “Add”.
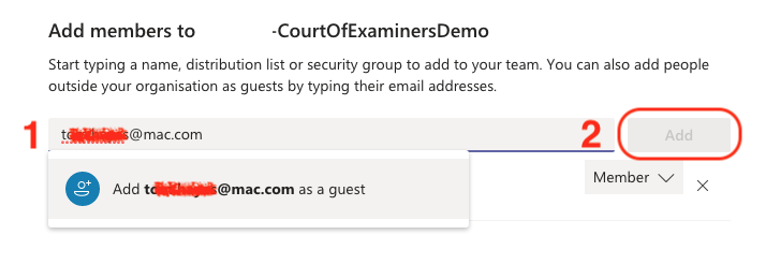
Adding a Guest member to your Team (someone from outside of Trinity)
To add a “Guest” (e.g. a person who does not have a Trinity username / account), type in their full email address as shown and click “Add”.
Note:
They will be listed as a “Guest”. An email will be sent to the email address you entered and they will be invited to join the Team.
If the “Guest” has an existing Microsoft 365 login, then you should invite them to join the Team using their Microsoft 365 address (if they permit). Otherwise they may be asked to create a new Microsoft 365 login ID (at no cost), or they may experience an error.
For example, some people use a long form email address such as An.Other@company.com, which is an alias to their Microsoft 365 login ID – another@company.com. In this example you should invite the person to the Team using the email address another@company.com.
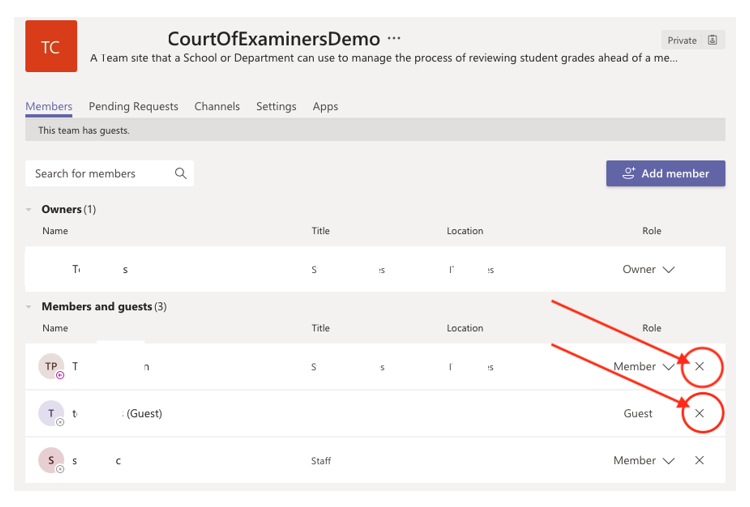
Removing members from a Team
If you wish to remove people from the Team, click on the “X” as shown.
Assigning a Team owner to your Team
As directed in the guidelines listed above, each Team must have at least two owners; ideally, this would be the Chair of the Court of Examiners and the secretary.
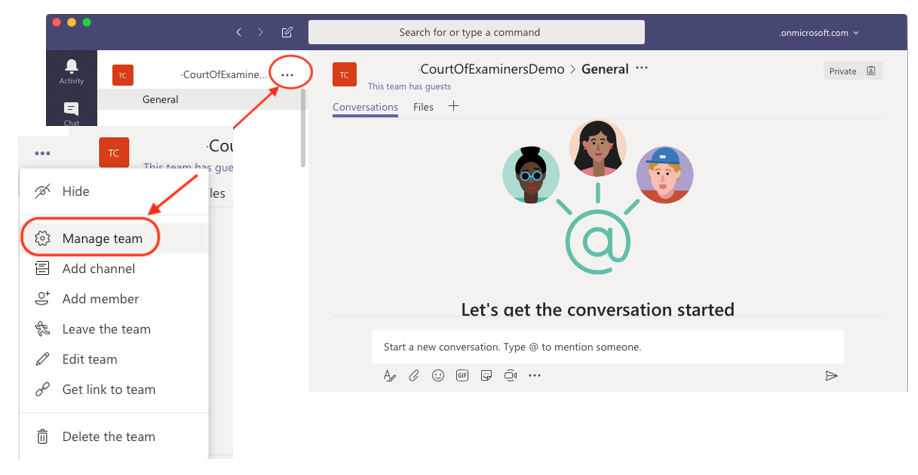
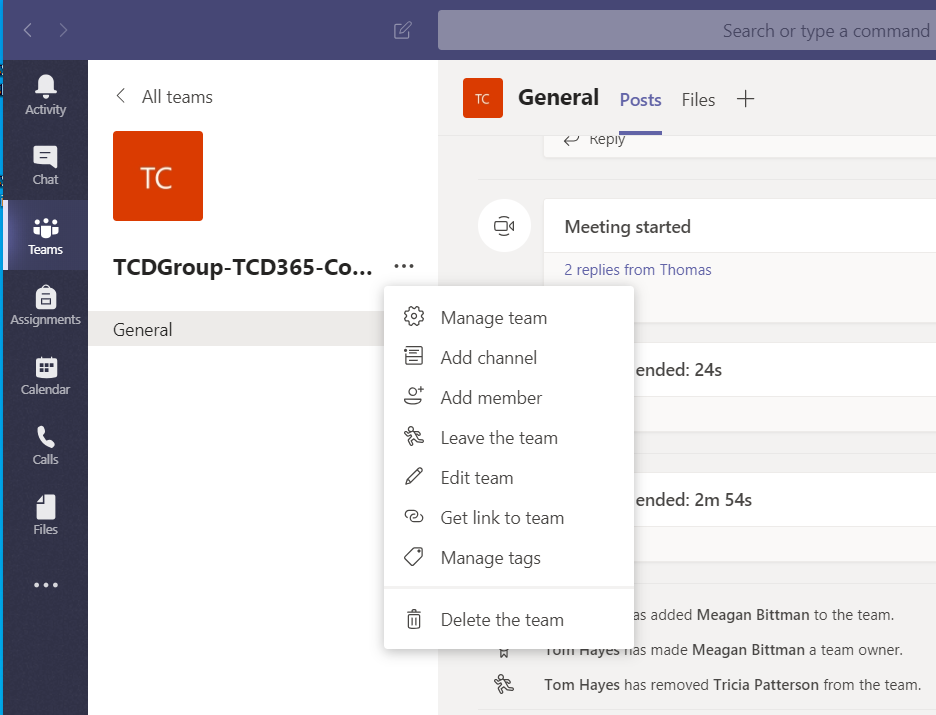
- To assign a Team owner, click on your Team and then three dots drop down menu
- Select 'manage team' from the menu
- Ensure that the 'Members and guests' heading is expanded so that all members and guests are expanded
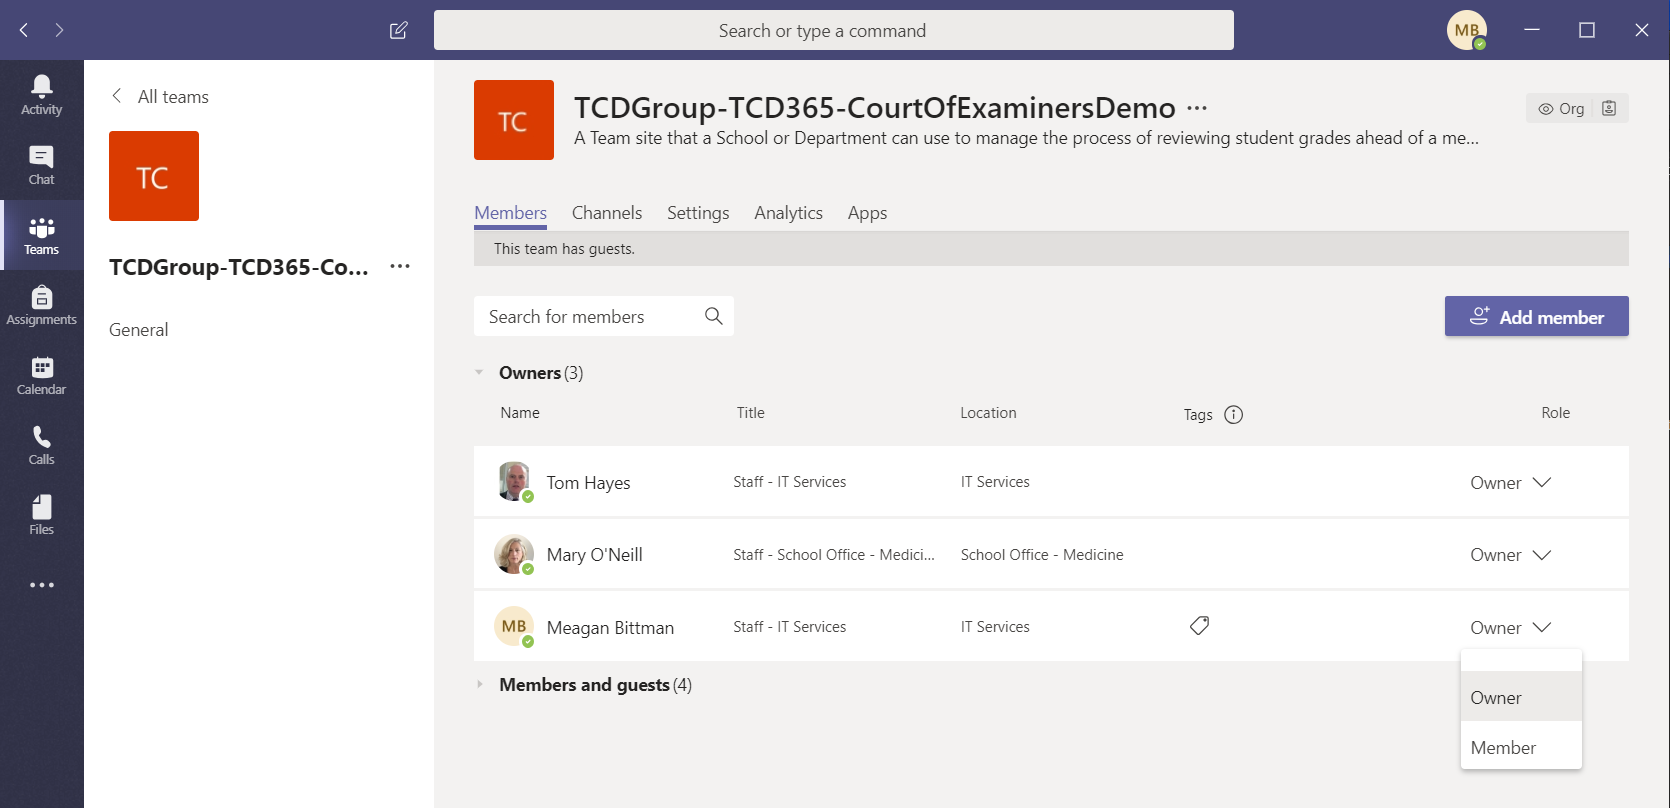
- Find the name of the person who you wish to elect as an owner
- Under the 'Role' heading, towards the right of the screen, click on the word 'member' and select 'owner'
Creating 'view only' folders for the members in your Team
Creating 'view only' folders in your Team
This will allow Team members and guests to open and view the documents in the folder, but they won’t be able to download or edit the documents. This applies to Office (Word, Excel and PowerPoint) and PDF documents.
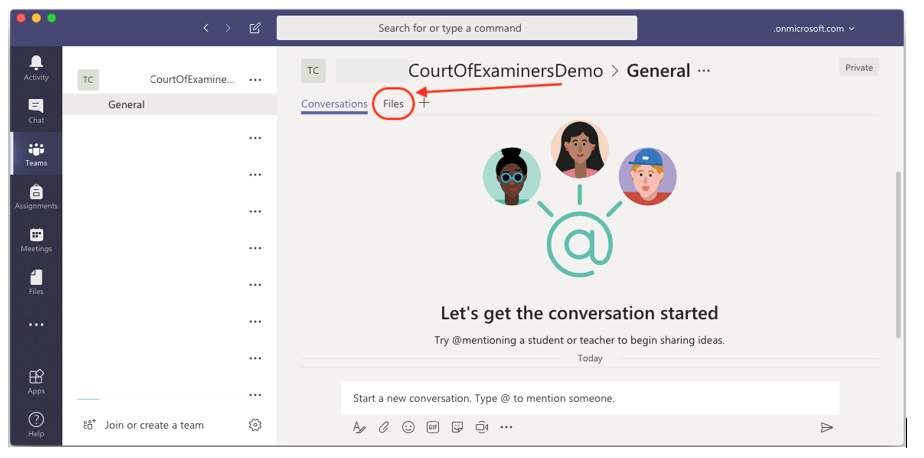
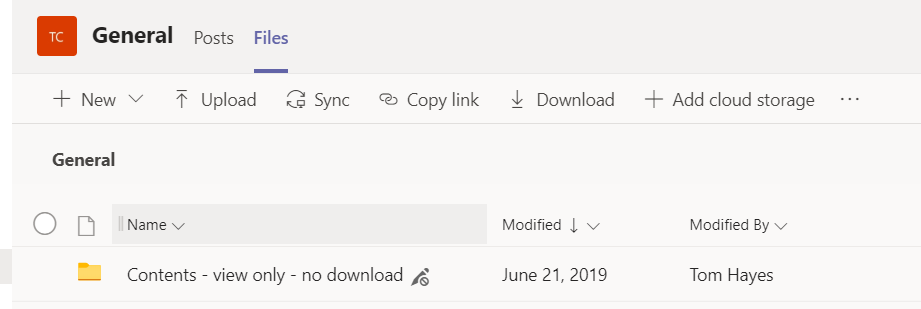
- Click on the 'Files' tab in your Team
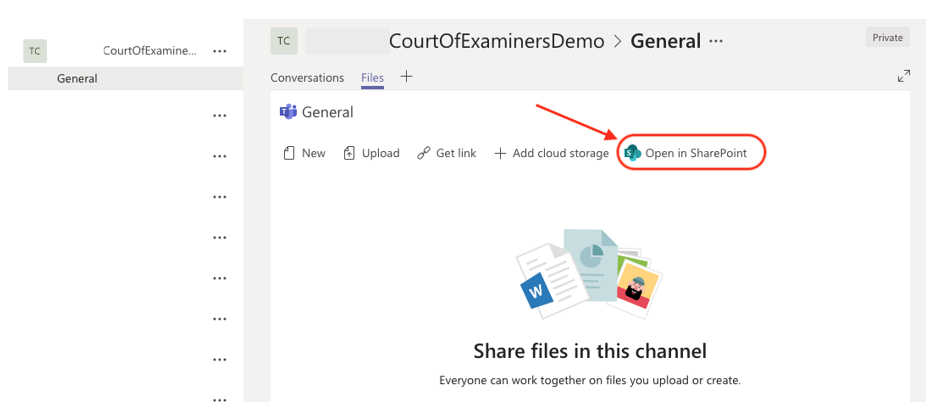
- Click on the 'Open in SharePoint' link
- Click on the 'New' button and select the 'Folder' option
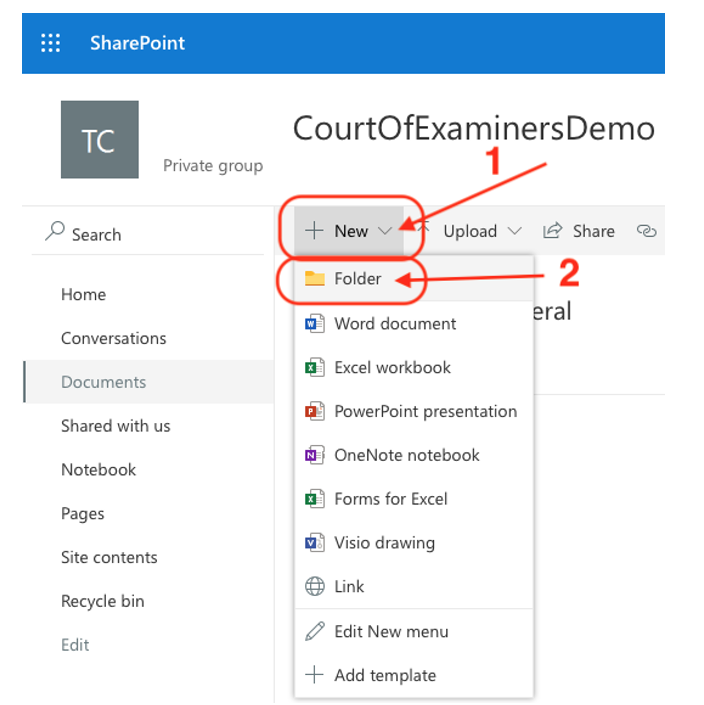
- Give the folder a name (something like 'Documents - view only') and click create
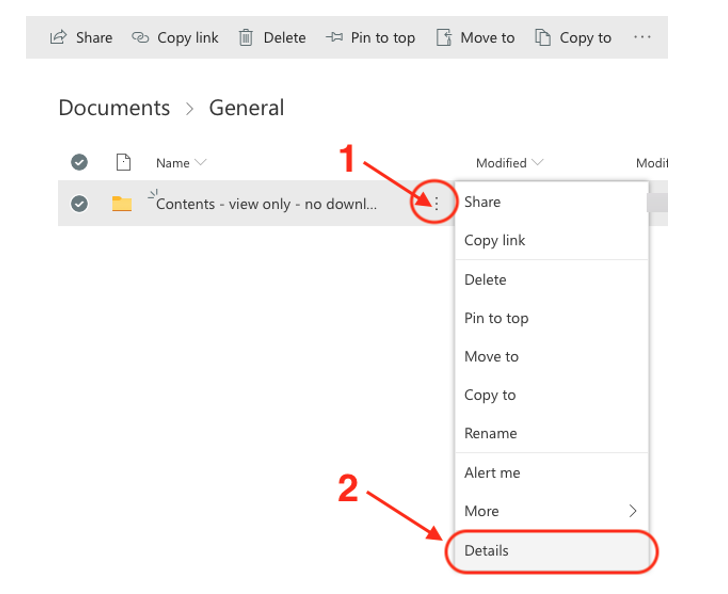
- Click on the three dots and select 'Details'
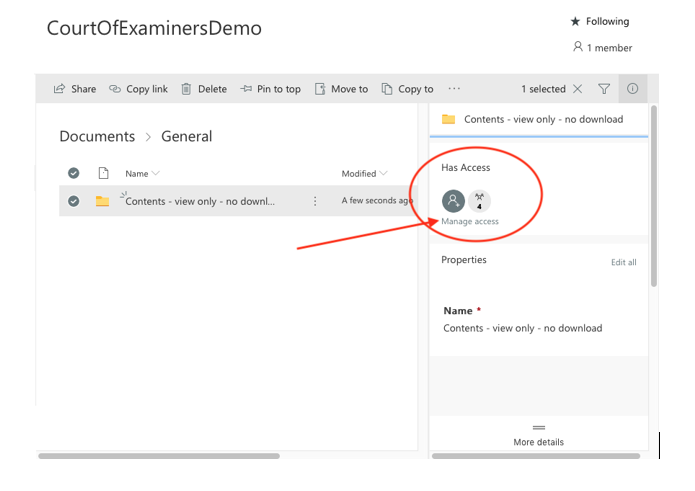
- Click on 'Manage access'
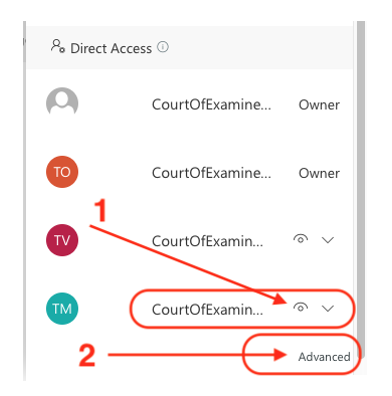
- Click on the dropdown arrow to change the permissions from 'Can edit' to 'Can view'

- Make sure that the icon next to the Members group is an eye and then click on the 'Advanced' link
- Select the 'Members' and 'Visitors' group as shown below and then click on the 'Edit Users Permissions' button at the top
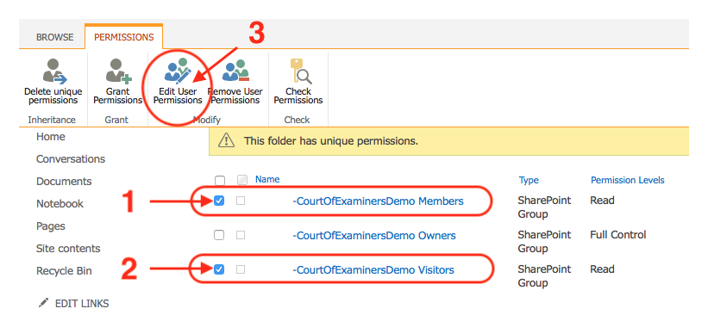
- Tick the box next to 'Restricted view'. By doing this, you will be restricting member access to viewing pages only; they will not be able to download anything out of this folder or edit any files in it.

- Click Ok
Creating or uploading protected 'view only' documents to your Team
Instructions for creating or uploading protected documents to your Team
Now that the Team folders are protected, only Team owners will have permissions to add to them.
Owners can either create a document (such as a Word document or Excel file) directly within a protected folder within the Team or the owner can upload a file which will be marked as 'protected' as soon as it is added to the protected folder (created in the steps above: Creating 'view only' folders for the members in your Team
Creating a protected document from within Teams:
- Click on the 'Files' tab from within Teams and select the folder which is protected
- Click on 'New' and select what type of document you wish to create
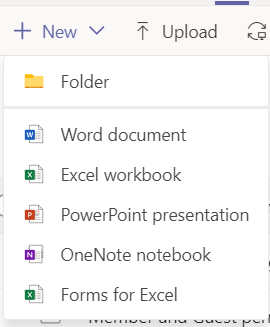
Please note: the same process can be repeated for uploading documents, except instead of clicking on 'New' you now select 'Upload'.
Scheduling an online / video Court of Examiners meeting
Teams can be used to facilitate remote video conferencing meetings with colleagues or collaborators who are working in different physical locations using any laptop or mobile device which is equipped with a camera and microphone. For instructions, view the Meetings and Calls with Microsoft Teams - Getting Started Guide.
This feature can be used to schedule an online Court of Examiners meeting.
More information about Teams
Microsoft Teams can be very useful for conducting an online and paperless Court of Examiners. Please see our website for more information about Teams.