

Creating TCDpolls content in the web dashboard
The following information shows how to create and present TCDpolls content via the web dashboard at tcdpolls.tcd.ie.
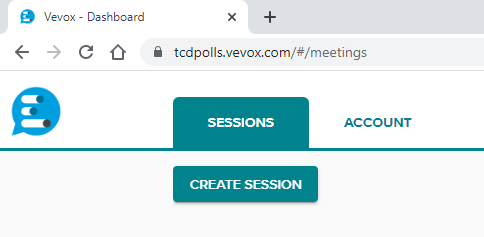
- Browse to tcdpolls.tcd.ie
- Click on 'Login with SSO'
- If already logged into Microsoft 365, you will be brought straight to the TCDpolls web dashboard
- If not logged in to Microsoft 365, enter your Trinity email address (in the form bloggsj@tcd.ie) and password to continue
- Once signed in; under the Sessions tab, click on the Create Session button
- In the popup window, enter a Session name and click the Create button

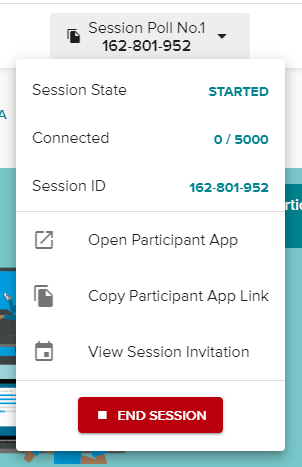
- You will then be brought to the dashboard landing page for this session. A unique Session ID (a 9-digit number) will be generated for the new session. This ID will be visible at the top of the screen

- To change any of the session settings, click on the Settings button in the left-hand menu. This will open a pop-up window which has five sections:
- Setup
- Features
- Identification
- This option allows you to do identified (non-anonymous) participant polls
- Theme
- Sharing
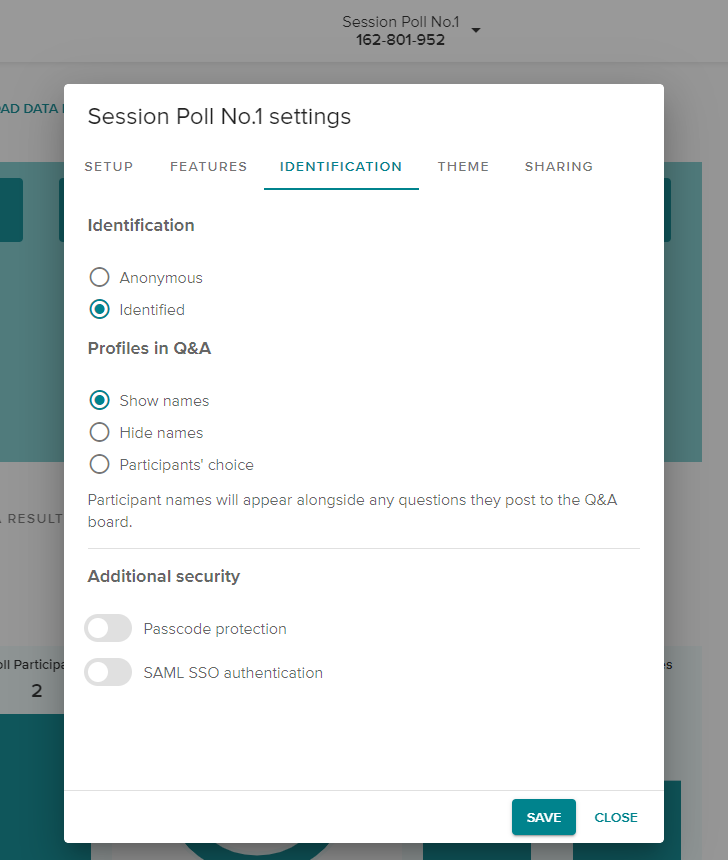
- Close the settings popup to return to the dashboard.
- On the left-hand menu, you will see Polls, Q&A and Surveys. It is possible to use each of these features within one session. For our guide, we will only use the Polls option
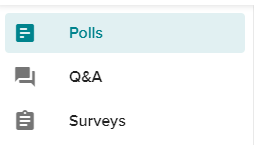
- There are three options in which you can create Polls questions. We will only cover the first option
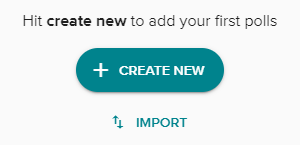
- Create new questions
- Import questions from a file
- Use one of the example template questions from Vevox
- To create your poll questions, click on the Create new button
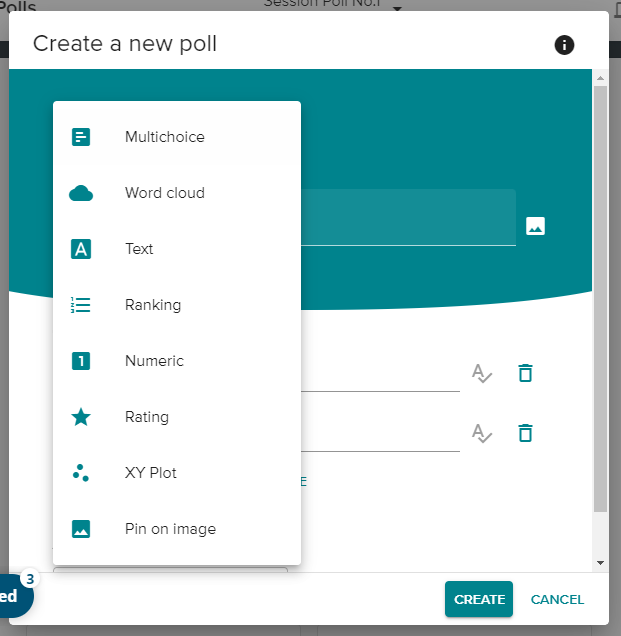
- In the Question type dropdown, choose the type of question you want to create (e.g. Multichoice, Word cloud, etc.)
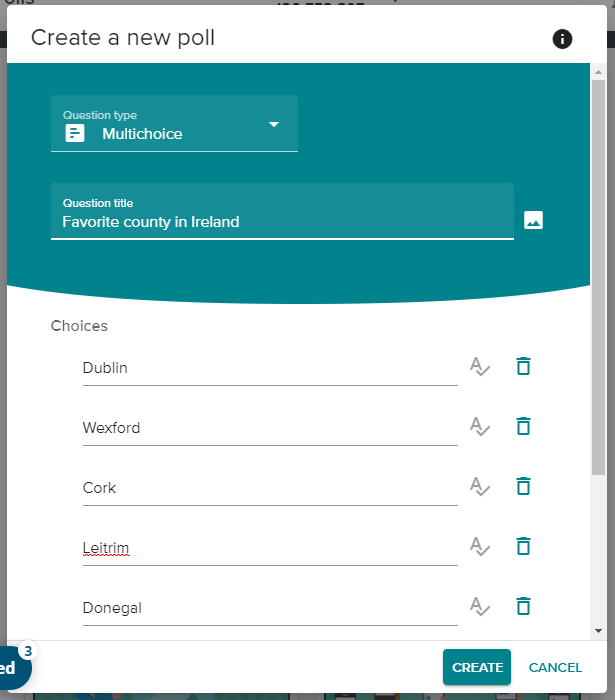
- Enter the question details and click on the Create button
- Repeat the above three steps for each question in your session
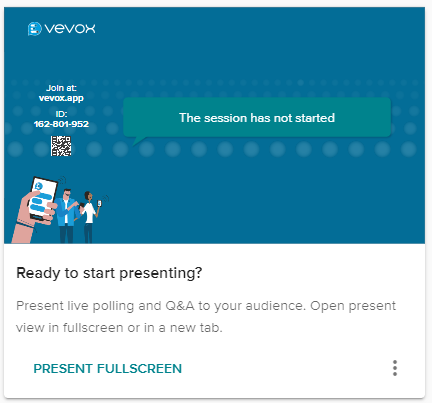
- Once you are ready to start collecting answers, click on the Present fullscreen button in the dashboard
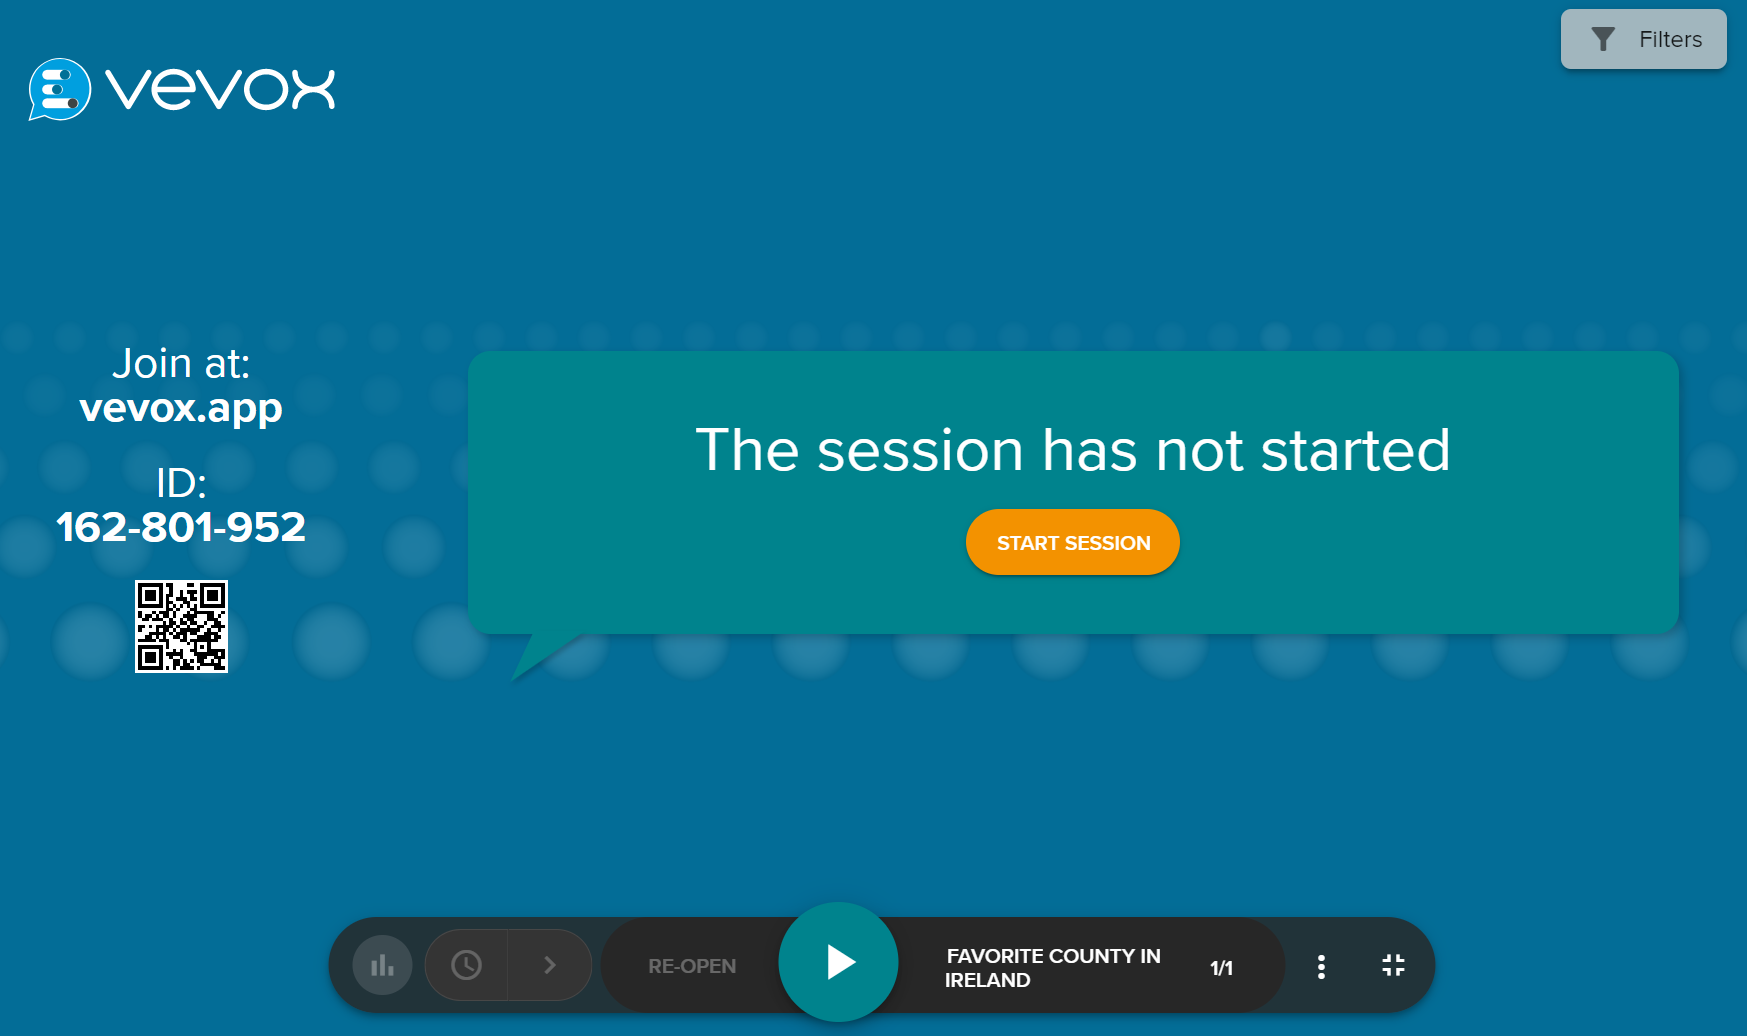
- The browser window will switch to fullscreen mode. To make the session active, click on the Start session button. The 'join session' instructions are displayed on the left-hand side of the screen
- Participants can join the session using either of the following methods:
- The taskbar at the bottom of the screen allows you to open the poll, navigate through your poll questions as well as show the results of the poll. To begin, click the play button

- The first poll question will then be displayed. Participants can respond via their device
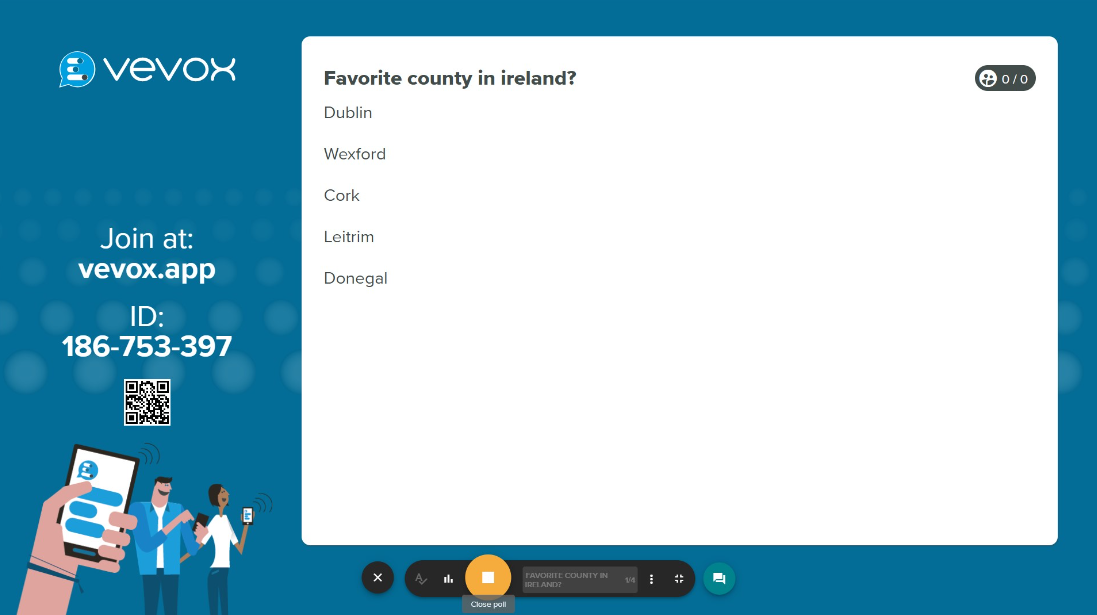
- To stop accepting responses to a poll question, click on the stop button. The results of the poll question will then be shown on the presenter's screen. The participants can also see the results on their devices

- To advance to the next question, click on the next poll button

- When finished gathering responses, exit the fullscreen presenter mode by clicking the Esc key on your keyboard. To close the session, hover your mouse over the session ID in the top middle of the screen and click on the End session button
- To review the participant's responses to the poll questions, click on the Data menu item in the left-hand menu. You can either view the responses on screen or download a responses report in Excel format

- To switch to a different poll session you have created, click on the Vevox (speech bubble) logo in the top left of the screen. You will then see all sessions you have previously created