

Record a lecture in a Senior Lecturer Pool Room using the Panopto desktop application
The instructions below outline how to make a screen-capture recording (audio and video), using the Panopto Desktop App, in any of the Senior Lecture Pool Room lecture theatres in Trinity.
This service is only available to Trinity staff who have been setup as instructors on Module(s) in Blackboard. Before being able to follow the steps below you must have already setup Panopto for your Module in Blackboard.
It is also possible to record a video using the Panopto Capture Browser App as opposed to the Desktop App.
For a feature comparison between the Desktop and Browser versions, please refer to Features, differences between, and capabilities of Panopto's recorders.
The exact steps are slightly different on Windows PC and Apple Mac so please choose the relevant option below to see the instructions for your computer.
How to record using Panopto in Blackboard for Windows PCs
- Log into the Windows computer using your Trinity username and network login password.
- Log into Blackboard (mymodule.tcd.ie).
- Select the Module from your Module List that you wish to record a lecture to - remember that you must have already setup Panopto for your Module in Blackboard before you can use Panopto the first time in that Module.
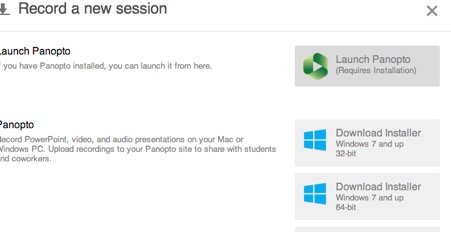
- Click your Lecture Recordings link that you created for this Module and then choose Create, and then Record a new session.
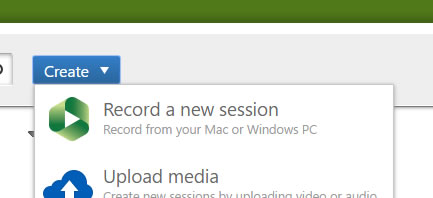
- Click Launch Panopto - the Panopto app will open on the 'Create New Recording' tab.
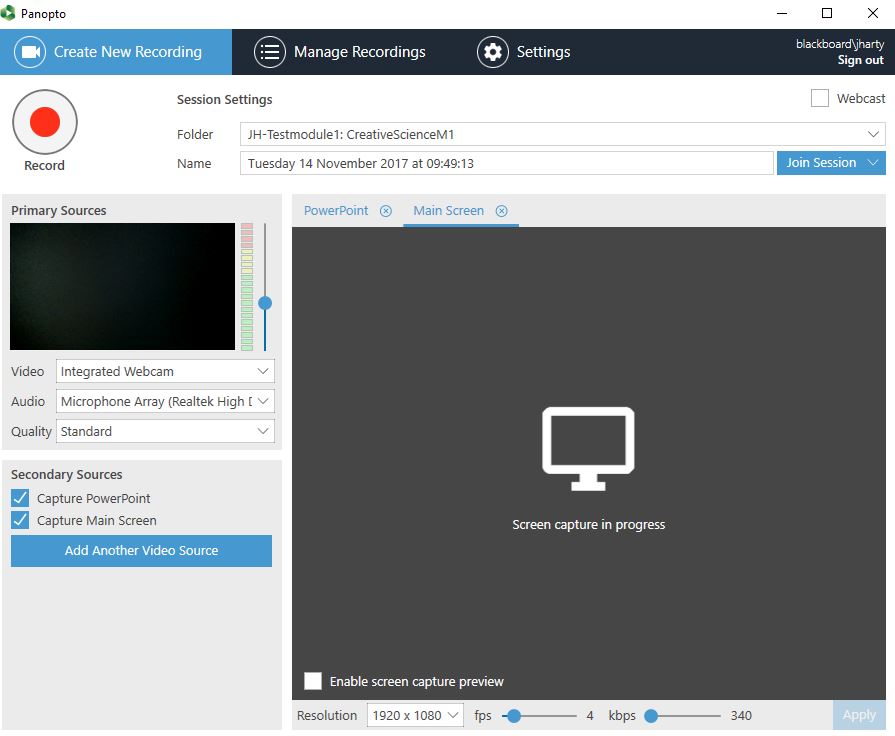
- On the above screen you can see the Folder that the recording will be listed under for that Module.
- Beside Name enter a sensible name for this recording session - something that will help to clearly identify it later.
- On the left you will see that 'Capture Main Screen' is selected by default, meaning that all actions carried out on the computer screen will be recorded.
- Under Primary Sources, Video would refer to additional video devices and be left off.
- Usually Audio will be selected to be On already, recording audio through the mic, and you can set a Quality level.
- You can select to 'Capture Computer Audio' if you wish to record audio generated by applications you use during your recording.
- There is a 'Webcast' option towards the top right that will generate a web address that you can share to anyone who is not present but who you wish to be able to see the presentation as it happens.
- When you are ready to begin recording click the red Record button towards the top left.
- When you are finished your recording click the Stop button.
- Once the recording ends, either choose Delete and record again if you are not happy with the recording or click Upload to save the recording to the TCD Panopto Cloud storage location. A copy is also stored to the local Windows computer.
- After choosing Upload, the Manage Recordings window will display showing you a historical list of recordings, with the most recent at the top.
- Note that it takes a few minutes for your new recording to be fully uploaded to the TCD Panopto Cloud location. When this process is complete you will have the options to the right of the recording to Resume, Share, Edit or View. You will also receive an email to your Trinity email account to confirm the video has been uploaded successfully.
- By default the new lecture recording will be viewable by the students enrolled in that module when they log into Blackboard. They can find the recorded content by accessing the relevant Module and choosing Lecture Recordings.
- The Share option is only required if you want to share the video out to other users beyond those students who are enrolled on your Module.
- If you wish to carry out any edits on your video please see our page on how to edit videos recorded in Panopto.
How to record using Panopto in Blackboard for Apple Macs
- Log into the Mac using your Trinity username and network login password.
- Log into Blackboard (mymodule.tcd.ie).
- Select the Module from your Module List that you wish to record a lecture to - remember that you must have already setup Panopto for your Module in Blackboard before you can use Panopto the first time in that Module.
- Click your Lecture Recordings link that you created for this Module and then choose Create, and then Record a new session.
- Click Launch Panopto - as the software is already installed on the Senior Lecture Pool Room computers you can ignore any 'installation required' message that may display.
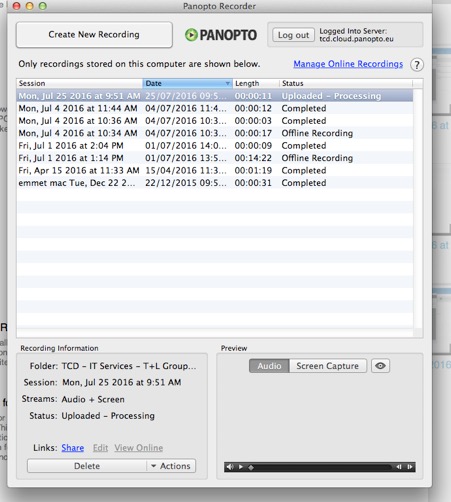
- The Panopto Recorder window opens:
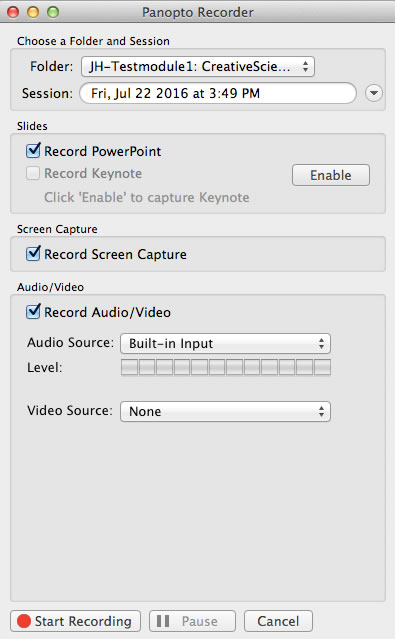
- Beside Folder you will see where the recording will be saved to.
- Beside Session you should enter a sensible name for this recording session - something that will help to clearly identify it later.
- Under Screen Capture you will see 'Record Screen Capture' is selected, meaning that all actions carried out on the computer screen will be recorded.
- Under Audio/Video you will see the listing for Audio Source is set to 'Built-in Input' referring to the lecture theatre mic
- Video Source would refer to video additional to the screen capture, such as a webcam and is usually left set to 'None'.
- Once you are ready to record, click Start Recording, and when finished choose Stop Recording.
- If you are not happy with the recording you can choose Delete. Otherwise it will take 1-2 minutes to upload the video to the TCD Cloud Panopto site and you will receive an email to your Trinity email account once the upload is complete.
- By default the new lecture recording will be viewable by the students enrolled in that module when they log into Blackboard. They can find the recorded content by accessing the relevant Module and choosing Lecture Recordings.
- If you wish to carry out any edits on your video please see our page on how to edit videos recorded in Panopto.
How to record using Panopto in the Panopto Cloud Portal (https://tcd.cloud.panopto.eu) for Apple Mac
- Log onto the Mac (Mac Mini) computer in the public theatre or seminar room with your Trinity username and password.
- Launch a web browser (such as Safari or Firefox) and type in the TCD Panopto Cloud web link (http://tcd.cloud.panopto.eu)
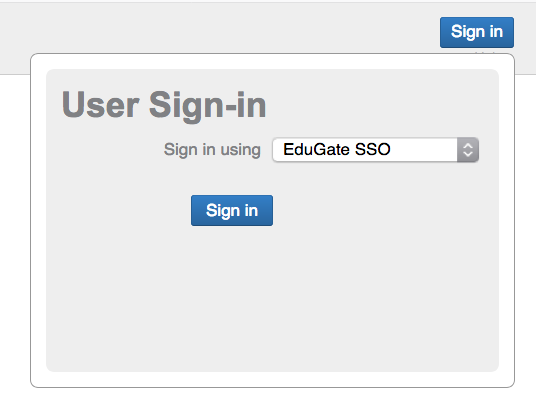
- Click on the Sign in button on the top right hand side of the window
- Click on the Sign in using button and choose the EduGate SSO option from the drop down menu.
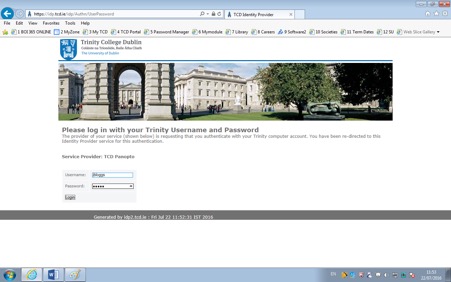
- Type in your Trinity username and password into the relevant fields.
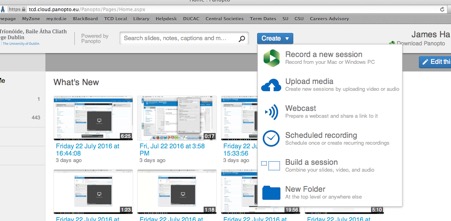
- Once you are logged into the TCD Cloud Panopto Portal window, click on the Create button.
- Click on the Create button once more and choose the Record a new session option to create a new lecture recording.
- Click on the Launch Panopto button (Note: that the Panopto Lecture Capture software is already preinstalled on all computers in the public theatres and seminar rooms by IT Services, so there is no need to install again).
- The Panopto Recorder window will open, here you can choose a number of settings:
- The default folder for storing your recordings is the my folder.
- You can change the Session name from date and time to something more meaningful if you want.
- You can click the Record Powerpoint box if not already ticked.
- You can decide whether you want the Record Screen Capture box if you want your mouse movements and clicks to be recordings during the recording session.
- You can click on Record Audio/Video box and choose your audio (most people will want to record audio), some may want to record video if there is a camera facility within the room).
- When you are ready to record, click the Start Recording button, you can pause the recording at any time by clicking on the Pause button
- Once your lecture is completed, you can click on the Stop Recording button and the recording will begin to be uploaded to the TCD Panopto cloud storage area. This may take a few minutes to complete. Once it is fully complete, an email confirmation will be sent to your email address that the lecture recording is ready for editing, sharing and viewing.
- In the Panopto Recorder window, you can monitor the status of the recording in the Status field and once completed, you should have the three options at the bottom of the window to Share, Edit and View Online.
- If you are not happy with the recording you can either or you want to delete the whole recording, highlight the recording you want to delete and click on the Delete button in the Panopto Recorder window.
- Once finished, don’t forget to log out of the TCD Cloud Panopto Portal, close your web browser and log out of the Macintosh computer.
Additional Notes:
- There is the Edit option which allows you to edit the recording.
- You also have the view online to playback and review the recording.
- Once the upload has completed, you can click on the Share option to share out to your recipient list or targeted email addresses.
- You can get more advice on how to edit or share from the Panopto tutorials on the Panopto global website.
How to record using Panopto in Panopto Cloud Portal (https://tcd.cloud.panopto.eu) for Windows PCs
- Log onto the Windows computer in the public theatre or seminar room with your Trinity username and password.
- Launch a web browser (such as Firefox or Google Chrome) and type in the TCD Panopto Cloud web link (http://tcd.cloud.panopto.eu)
- Note: Do not click on the Panopto Recorder in the Start menu, as this method of accessing the portal to record lectures displays in a smaller window which makes recording more difficult, so this method is not recommended
- Click on the Sign in using button and choose the EduGate SSO option from the drop down menu.
- Type in your Trinity username and password into the relevant fields.
Once logged into the TCD Panopto Cloud Portal, there is no need to download the Panopto Software onto the Windows computer as IT Services have the software already pre-installed so please ignore the Download Panopto option on the top right hand corner.

- The default folder to save into is the My Folder.
- You can choose to change the Name field to something more meaningful, rather than the date and time name.
- You can choose your video and audio options.
- You can capture the audio of the computer itself if you lecture plays a video such as a YouTube video during the lecture.
- You can choose to capture your PowerPoint presentation and screen capture as well.
- You can choose the Webcast option to create a url where students can watch the lecture live or join in on the lecture from offsite.
- When you are ready to begin the lecture recording, click on the Record button. You can pause the recording at any time.
- Once your lecture is over, click on the Stop button.
- The Recording Complete window will pop up, you can either choose to delete and record again or Upload if you are happy with the recording.
- Click the Upload button.
- The Manage Recordings window will be highlighted and it will take a few minutes for the recording to be uploaded and saved.
- Once uploaded, you will have options to view (playback), edit (the recording) and share (to users you haven’t already shared to). You will find tutorials on the Panopto website on how to edit and share your recordings.
- You’ll be able to see your uploaded lecture in the main TCD Panopto Cloud window under your folder name, again you’ll have options in there to edit the recording etc.
- Lastly, don’t forget to log out of your TCD Panopto Cloud EU portal when finished recording lectures to prevent unauthorised access to your lecture recordings and log out of the windows computer from the desktop to maintain security of your Trinity account.
Additional Note:
This method of recording lecture recordings should only be used by lecturers who do not use Blackboard to teach their course modules. For those who do use Blackboard for teaching their course modules, you should refer to the instructional guide elsewhere on the IT Services website on how to record your lectures within Blackboard under the relevant module.