

Resource calendars in Microsoft 365
A 'resource' calendar tracks the availability of a meeting or conference room or can be used for equipment (e.g. projectors, laptops) that you have may in your area.
If you have a resource (room / laptop / projector etc) that you want to share and manage via booking, you will need to place a request for a resource calendar.
Below you will find some general information on how to manage and use your resource calendar.
How to view a resource calendar from your mail online
- Log into your Microsoft 365 email account at http://mail.tcd.ie.
- Click the calendar icon in the bottom left corner of your window.

- Click the Add calendar dropdown from the menu above your calendar.

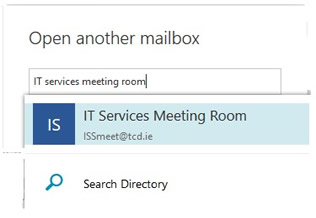
- Enter the calendar name and either select it from the automatic look up list or click 'Search Directory' to find the resource calendar.
- Click 'Open'. The resource calendar will be available in your calendar list on the left
Booking a room or resource for a meeting
- Open Outlook
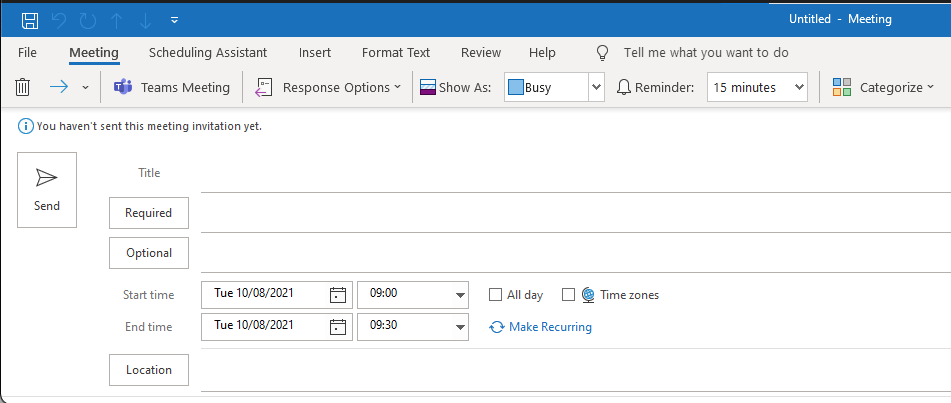
- Click on Meeting tab
- In the Location field, type the name of the conference room or equipment you want to reserve.
- In the Title field, type the purpose of the reservation or meeting.
- Change the Start time and End time. Or, choose All day event.
- Type a message describing the purpose and attach any files if needed.
- To allow others to join online or call in to the meeting, click Teams Meeting.
- To make sure the room, equipment, and people you've invited are available, click Scheduling Assistant at the top. Then select an available time in the calendar.
TIP: In the scheduling calendar, blue means the room or equipment is reserved, or busy. Select the white, or free, area on the calendar.
- When finished, choose Send.
Or, from your Calendar, just choose New Meeting.
If you are the owner of a resource calendar
To access the resource calendar options/settings
If you are the owner of a resource calendar you will be able to set the options/setting
- Click on the Settings (the gear icon) in the top right corner next to the resource name and select 'Options' from the drop-down list.
- Expand the 'Calendar' section in the left navigation pane.
- Click 'Resource calendaring'
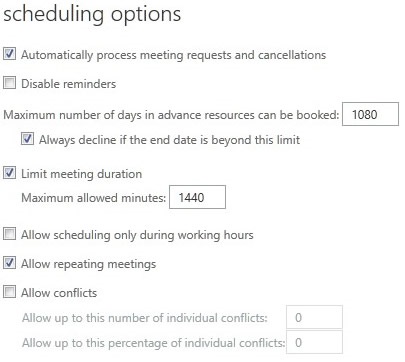
Typically you will not need to change the settings for your resource calendar, but if you do, then here is some more information about the settings for you:
- Automatically process meeting requests and cancellations should be left checked. If you have a need for manual processing, this is better handled through the options in the next section.
- If you choose Allow scheduling only during working hours, you can set the working hours by clicking calendar at the top of the options screen.
- Allow conflicts should not be checked otherwise you risk having two groups show up to use the same room at the same time.
If you would like the resource calender to be only bookable for specific people then:
Go to Settings (the gear icon) > Options > Calendar > Resource scheduling > Schedule permissions, and under the first option select specific users by clicking on Select one or more (as per image below):
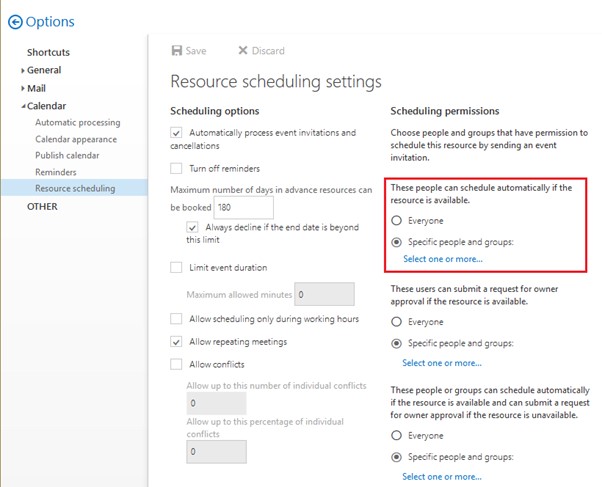
If you leave a Select Users and Groups field selected but blank, it means "no one falls into this category." So at this point, every request will require manual approval (from someone with Delegate permission).
Then you can decide if you want to give the additional access (the first or third option) to specific people.
For each of the three options in this group, you can select either "everyone" or specify a list of names and/or groups. The three options are:
- Who can schedule a resource automatically, if it is available.
- Who can submit a request to schedule a resource, if it is available.
- Who can schedule a resource automatically if it is available AND request manual approval if it is NOT available.
If you select Everyone for these three options, everyone can schedule a resource if it is available. If the resource is not available, they will receive an email message stating that it could not be scheduled, and the resource's delegates will be notified.