

Staff Wi-Fi - How to connect - Windows
Submit a network request
You can only follow the instructions below once your network request has been processed and you have received an email from IT Services with important configuration information.
If you have not yet submitted a network request, please follow the network request link to do so.
The instructions below are relevant where you have already completed the network steps to join the College domain using a wired or wireless connection
To connect your computer to TCDwireless network (Staff Wi-Fi service)
- Press the Windows key + R
- Type Control Panel and click OK
- Ensure View by: in the top right, is set to Category
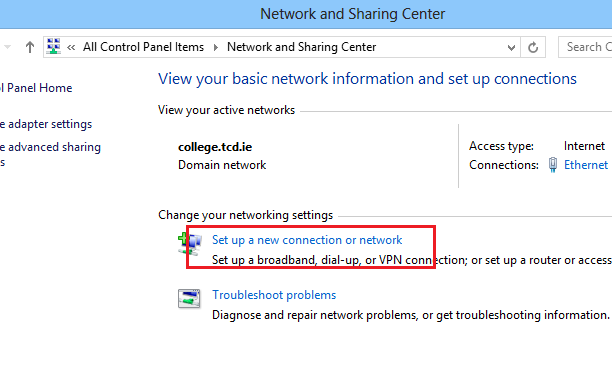
- Click Network and Internet
- Click Network and Sharing Centre
- Click Set up a new connection or network
- Click Manually connect to a wireless network, then click Next.
- Enter the following details:
- Network name: TCDwireless
- Security type: Select WPA2-Enterprise.
- Encryption type: Select AES.
- Tick Start this connection automatically
- Tick Connect even if the network is not broadcasting
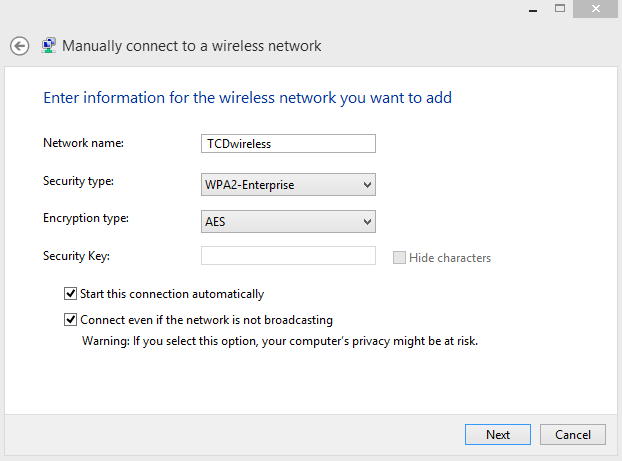
- Click Next
- If you are in range of the wireless network, you will see Successfully added TCDwireless message.
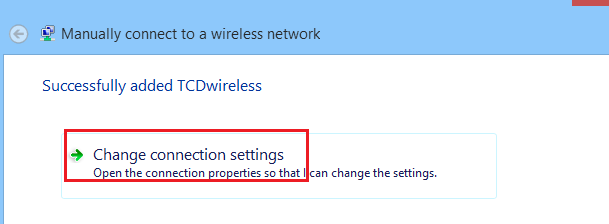
- Click Change connection settings.
- On the Wireless Network properties window, click the Security tab.
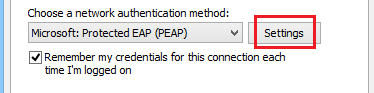
- Under Choose a network authentication method, click Settings.
- Deselect Verify the server's identity by validating the certificate check box. Then click Configure under Select Authentication Method.

- On the EAP MSCHAPv2 Properties window, do not select Automatically use my Windows logon name and password.

- Click OK three times to exit the Wireless Network properties.
- You should now be automatically connected to the wireless network.