
What is Power Bi?
Power BI is a data visualization and business intelligence tool developed by Microsoft. It allows users to connect to various data sources and create interactive dashboards and reports. Power BI helps users visualize data, discover insights, and view information.
Power BI has now been implemented after a review from the SU LENS campaign in 24-25 noted that some schools with high numbers found viewing the data within SITS hard and admin heavy. Having reviewed this process and from our own experience of Power Bi, we have developed a school/discipline Power Bi report for each academic area.
In this section you will find a series of short guides on some of the key functions necessary for Power BI reports pertaining to LENS information.
Below you will find instructions on how to access Power BI, refining your searches, extracting relevant LENS report information, etc.
How do I access Power BI?
It is encouraged that you bookmark your home page when you have gotten access to Power BI. However, you can also access it through the M365 Copilot and accessing it by following the steps shown here;
1) 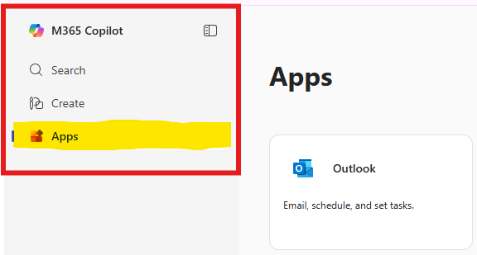
2)
Power Bi is taking the information held in SITS and student LENS reports and making it easier visually to view and find the data required by schools.
Access is provided annually, similar to the previous SITS access, via the MS Form circulated – This form is circulated by the disAbility Service and is sent out in July/August.
All staff listed must have completed the mandatory College Data Protection and Cyber Security Training prior to being granted access.
Access cannot be given to all school staff; only the names provided due to the classification of data being provided in the report.
Power Bi License can be requested for free via the IT Service Desk.
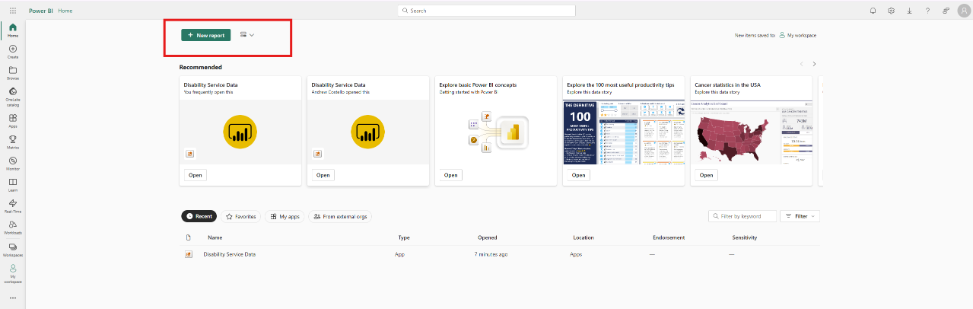
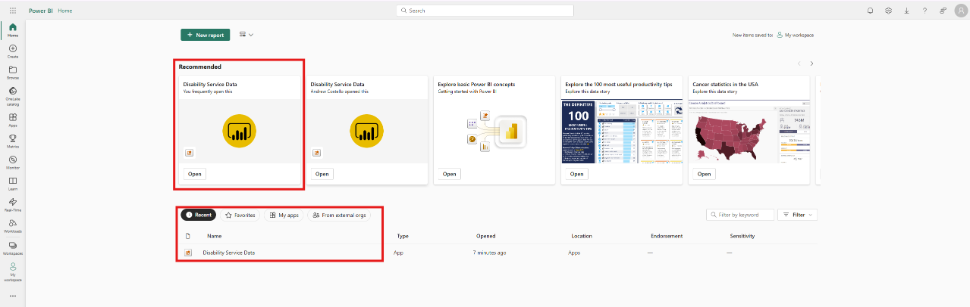
How do I open reports within Power BI?
Once you have located Power BI within your apps and you are in the home page, it is very straight forward to begin accessing any reports you have created or have been shared with you.
1) 2)
2)
How do I get specific information from Power BI?
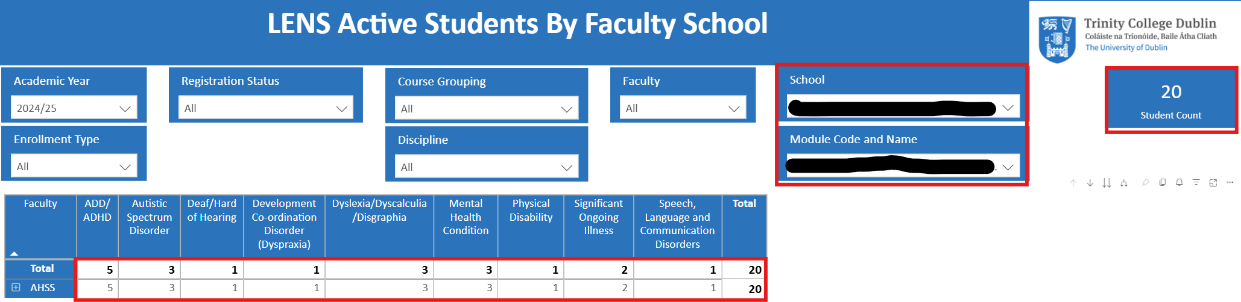
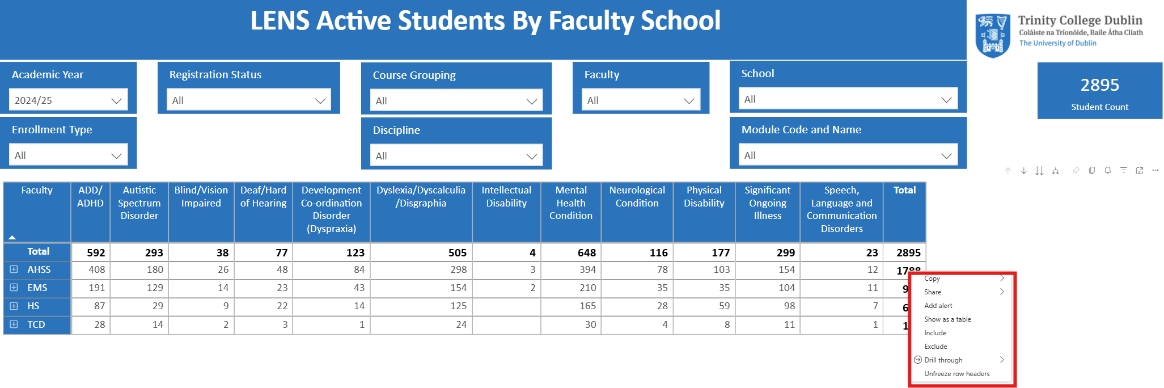
Power BI report search parameters are a much quicker way of refining the data and accessing student information in specified groupings without the need to look up each student individually, one at a time to compile the relevant information needed.
As you will see in the following images, you can refine the search parameters by selecting options such as Course Grouping, Faculty, School, Module Name & Code, etc. By narrowing the search parameters, such as applying the relevant Module or School who's data you overlook, it will reduce the number of overall students in the student count found in the top right of each page of the report. When you have successfully narrowed the data down to match your query, you will be all to summon a list of all students within those parameters with all the information you will require, eliminating the need to search for each student one-by-one.
1) All search parameters are blank and the full count of students is seen on the right. ![]()
2) When we refine the information down by selecting School and Module Code & Name, we immediately narrow the data set and will be able to move on to our next step to get all relevant information on the students in question, all held in one place together.
How do I extract narrowed down data for specific students?
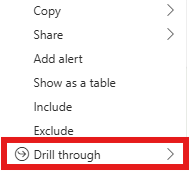
The 'Drill Through' feature is the key tool in refining the data and getting the specific student information you are looking for. You can use this feature in any report opened through Power BI. To access this feature, you simply right click on whichever data set you have opened and select the Drill through option, then select 'Student Details' to summon up a list of all students within those parameters. This is a significantly faster and more reliable way of gaining this information and removes the need to gather each student's relevant information individually.
1) By right clicking on the cell that shows the number of students with ASD in the School of English we will see the Drill Through Option.
 2) After right clicking, the user selects 'Drill through' followed by 'Student Details' to summon up a list of all students within the School within that data field.
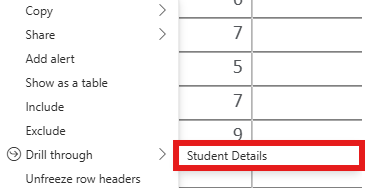
3) After selecting student details, users will be brought to a page that has the number of students within the parameters and a list of them all with all the pertinent information as seen below. From here the user can access each student on the list rather than needing to find each student individually. This list can be refined further prior to this by narrowing down the search parameters as covered in previous steps of this guide. 