Linking TCDpolls content with PowerPoint
The following information shows how to:
- Create a TCDpolls poll session and questions via the web dashboard at tcdpolls.tcd.ie
- Link your PowerPoint presentation with the TCDpolls poll session and questions
Create a TCDpolls poll session and questions
- Browse to tcdpolls.tcd.ie
- Click on 'Login with SSO'
- If already logged into Microsoft 365, you will be brought straight to the TCDpolls web dashboard
- If not logged in to Microsoft 365, enter your Trinity email address (in the form bloggsj@tcd.ie) and password to continue
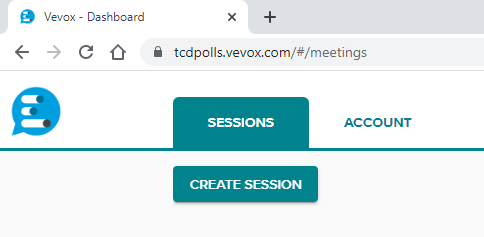
- Once signed in; under the Sessions tab, click on the Create Session button
- In the popup window, enter a Session name and click the Create button

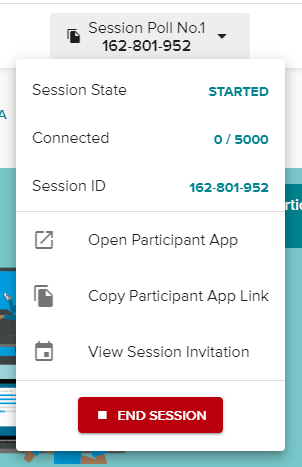
- You will then be brought to the dashboard landing page for this session. A unique Session ID (a 9-digit number) will be generated for the new session. This ID will be visible at the top of the screen

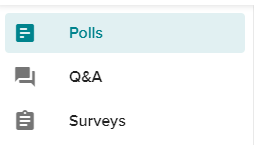
- On the left-hand menu, you will see Polls, Q&A and Surveys. It is possible to use each of these features within one session. For our guide, we will only use the Polls option
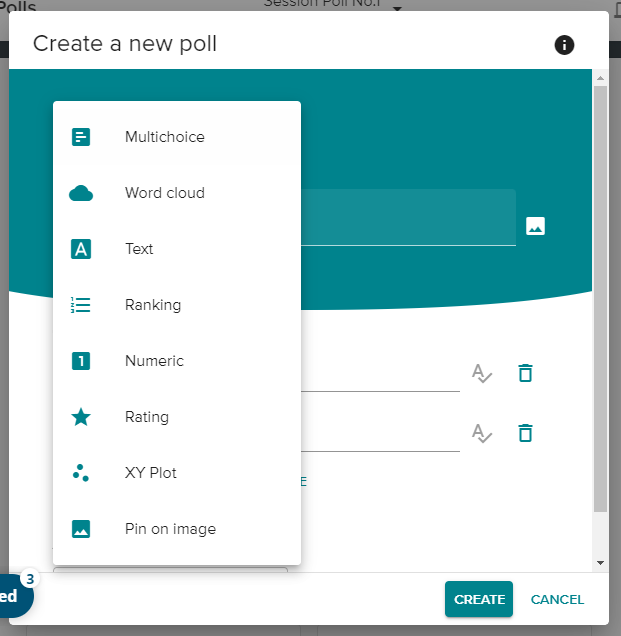
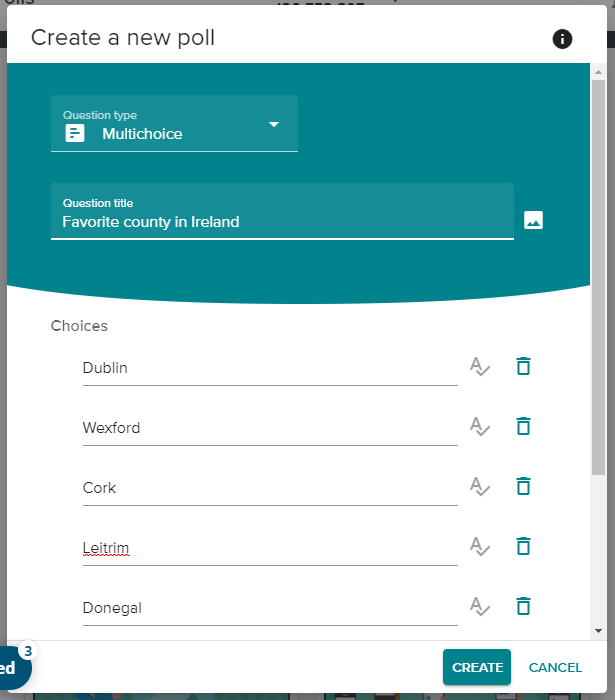
- To create your poll questions, click on the Create new button

- In the Question type dropdown, choose the type of question you want to create (e.g. Multichoice, Word cloud, etc.)
- Enter the question details and click on the Create button
- Repeat the above three steps for each question in your session
Link your PowerPoint presentation with the TCDpolls poll session and questions
- Open PowerPoint Desktop version
- The TCDpolls’ (Vevox) PowerPoint add-in does not work with the Web App version of PowerPoint
- Install the TCDpolls’ (Vevox) PowerPoint add-in if you have not done so previously
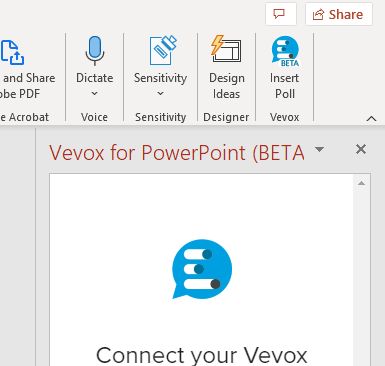
- Using the top menu in PowerPoint, click the Home tab. The last icon on the right of the Home tab menu will say Insert Poll. Click on this button and the Vevox for PowerPoint window pane will appear
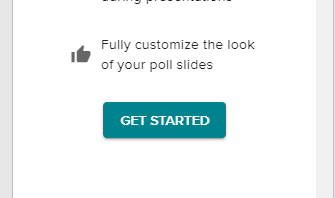
- Click on the Get Started button within the Vevox for PowerPoint window pane
- In the popup window, enter your Trinity email address and click the CONTINUE button. Do not click the LOG IN WITH MICROSOFT button
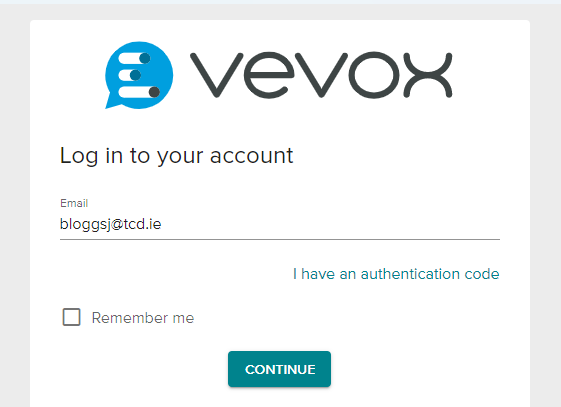
- If prompted, enter your Trinity account password to complete the login process
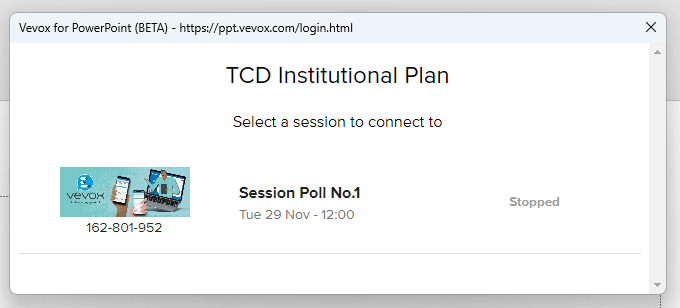
- You will see the list of sessions in your TCDpolls account. Click on the session you want your PowerPoint presentation to link to
- The details of the session, including any questions the session has, will then be listed in the Vevox for PowerPoint window pane
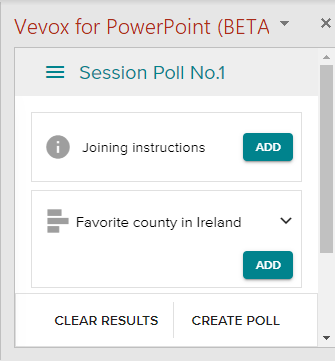
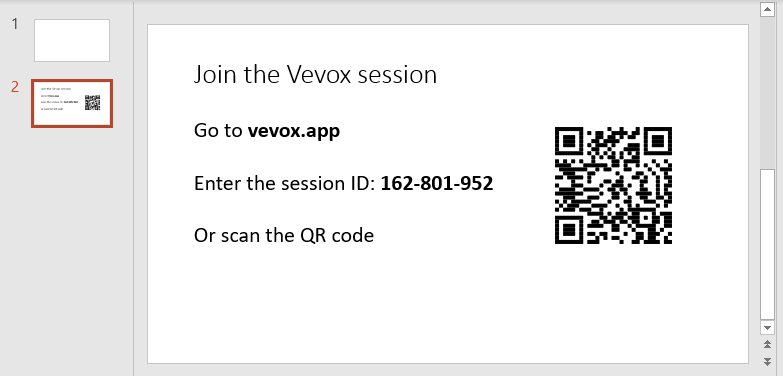
- Clicking the Add button next to the Joining Instructions tile will add a new slide to your presentation with details of how participants can join the TCDpolls session
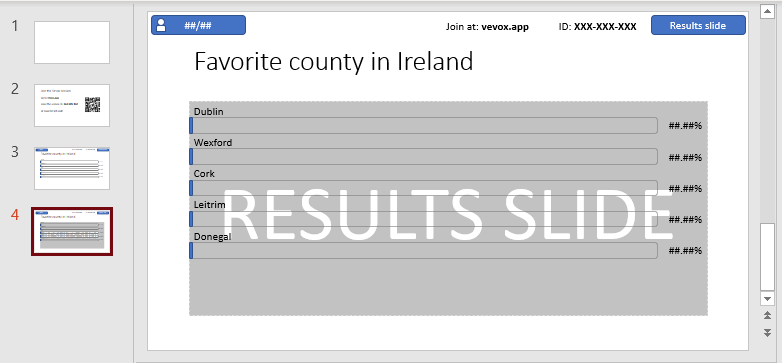
- Clicking the Add button next to any question tile in the Vevox for PowerPoint window pane will add a new slide to your presentation with that question. It will also add a second slide that will output the results of the question

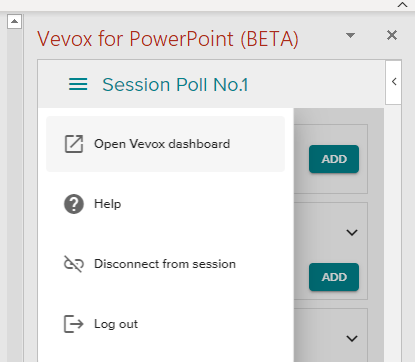
- Once you have all your PowerPoint slides ready to go, you will first have to start the TCDpolls session via the web dashboard at tcdpolls.tcd.ie. To open the web dashboard, directly from inside PowerPoint, click on the three-line menu inside the Vevox for PowerPoint window pane. From the menu items, choose Open Vevox dashboard
- Once inside the web dashboard, click on the Start Session button near the top of the page

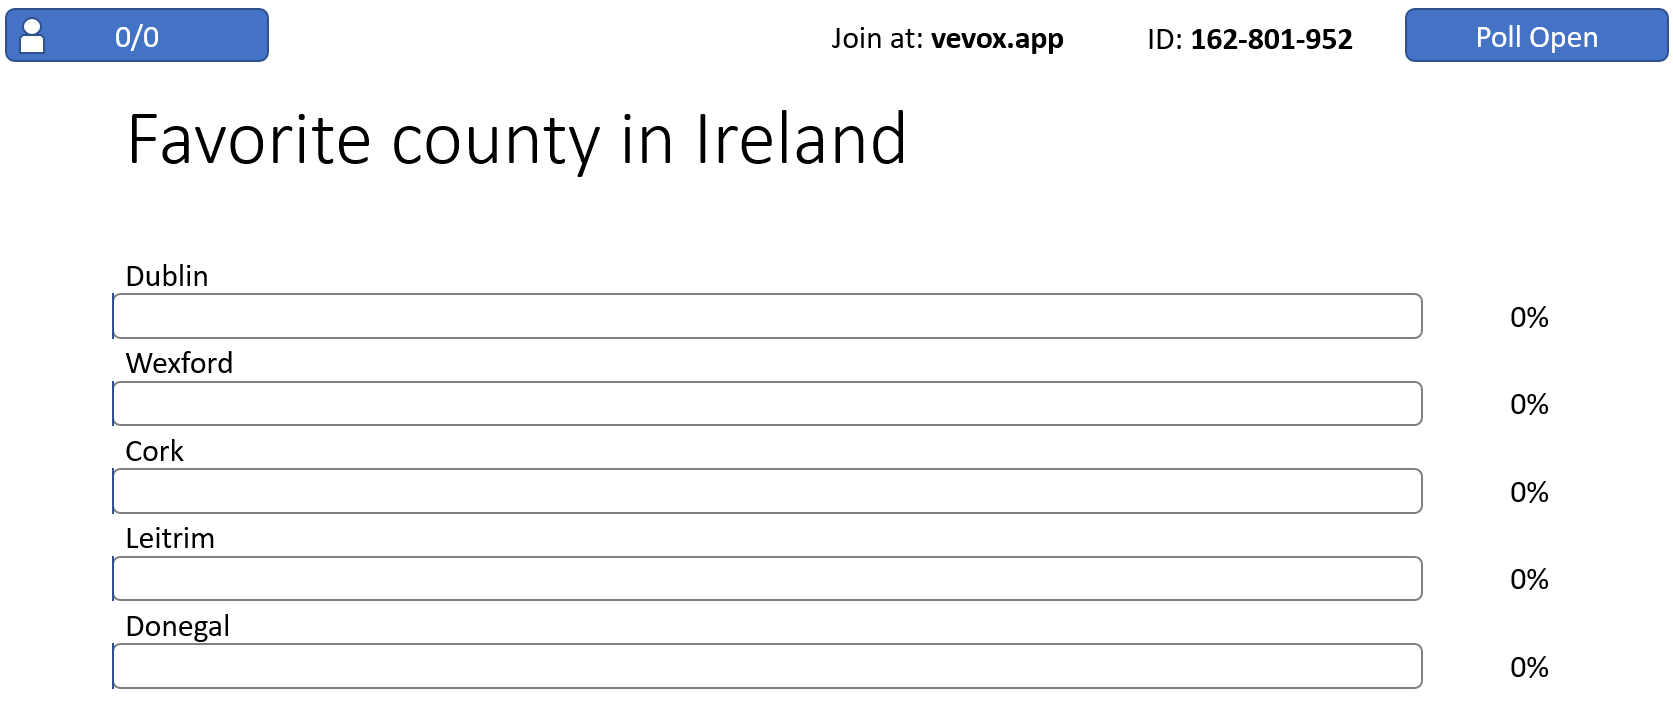
- You can now switch back to PowerPoint and start the slide show. Polls will automatically open when you reach a poll slide in your presentation
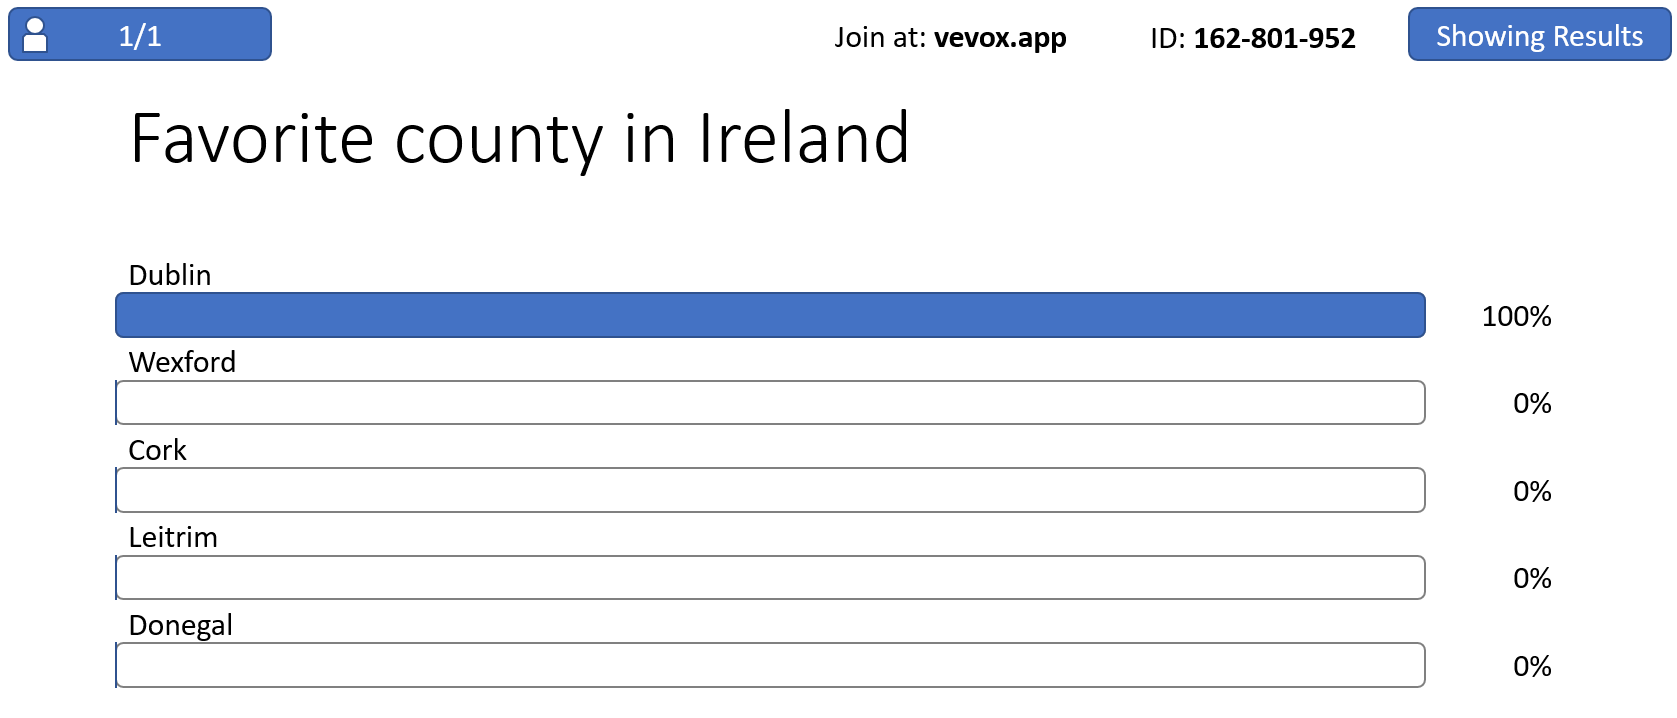
- Once you move your presentation onto the results slide, the poll will close and the results will be output
- When you have finished your presentation, you can view or download the results under the Data menu item in the web dashboard

- To end the session, in the web dashboard, hover over the session ID dropdown menu and click the End session button