
Trinity Panopto Portal
The Trinity Panopto Portal is a video content management web portal at panopto.tcd.ie that a staff member can sign in to create and record video content. It can be used to create and store staff training videos, it can record events such as professor inaugural talks, record live lecture streams, flipped classroom scenarios, record research fieldwork, audio only podcasts. It lets you share video content at the user level, the trinity organisation level, or the public internet level.
Panopto
Note: For lecture video materials for your students, use the Panopto-integrated service within Blackboard. The Panopto portal is for non-Blackboard video material, for a wider audience.
How to record using Panopto in the Trinity Panopto Portal for Apple Mac
- Log onto the Mac (Mac Mini) computer in the public theatre or seminar room with your Trinity username and password.
- Launch a web browser (such as Safari or Firefox) and type in (http://panopto.tcd.ie)
- Enter your Trinity computer account username (in the form username@tcd.ie) and click Next. If you forget to type the '@tcd.ie' part of your username, you will get an error message. Note: If you have signed in to Microsoft 365 with a second account, instead of seeing the above window, you will see a window titled "Pick an account." Choose the Trinity account, and you will be automatically signed into Blackboard.

- Once you are logged into the TCD Cloud Panopto Portal window, click on the Create button.
- Click the Create button again, then choose Record a new session to create a new lecture recording.
- Click on the Launch Panopto button.
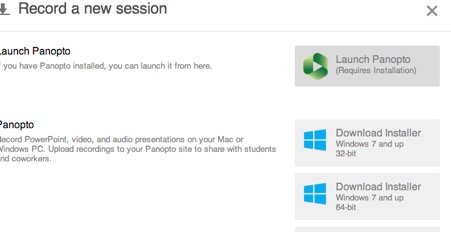
- The Panopto Recorder window will open, and you can choose several settings:
- The default folder for storing your recordings is the my folder.
- You can change the Session name from date and time to something more meaningful if you want.
- You can click the Record PowerPoint box if not already ticked.
- You can decide whether to enable the Record Screen Capture box to record your mouse movements and clicks during the recording session.
- You can click the Record Audio/Video box and choose whether to record audio (most people will want to record audio); some may want to record video if there is a camera in the room.
-
Record & Pause: Click Record to start; use Pause as needed during the lecture.
-
Stop & Review: Click Stop when finished. Select Upload (or delete to record again). This may take a few minutes to complete. Once it is fully complete, an email confirmation will be sent to your email address that the lecture recording is ready for editing, sharing and viewing.
- In the Panopto Recorder window, you can monitor the recording status in the Status field, and once completed, you should see the three options at the bottom of the window: Share, Edit, and View Online.
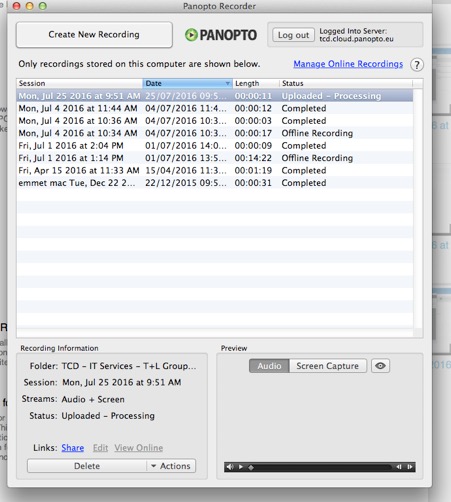
- If you are not happy with the recording, you can either delete the whole recording or highlight the recording you want to delete and click the Delete button in the Panopto Recorder window.
- Always log out of Panopto and Macintosh when finished to secure your account.
Additional Notes:
- There is an Edit option that lets you edit the recording.
- You can also view the recording online, play it back, and review it.
- Once the upload completes, you can click the Share option to send to your recipient list or to targeted email addresses.
How to record using Panopto in Trinity Panopto Portal for Windows PCs
- Log onto the Windows computer in the public theatre or seminar room with your Trinity username and password.
- Launch a web browser (such as Firefox or Google Chrome) and type in (http://panopto.tcd.ie)
- Note: Do not click on the Panopto Recorder in the Start menu, as this method of accessing the portal to record lectures displays in a smaller window, which makes recording more difficult, so this method is not recommended
- Enter your Trinity computer account username (in the form username@tcd.ie) and click Next. If you forget to type the '@tcd.ie' part of your username, you will get an error message. Note: If you have signed into Microsoft 365 with a second account, then rather than seeing the above window, you will see a window called Pick an account. Choose the Trinity account, and you will be automatically signed into Blackboard.
Once logged into the TCD Panopto Cloud Portal, there is no need to download the Panopto Software onto the Windows computer, as IT Services has it pre-installed.
-
-
Name & Save: Use "My Folder" and replace the date-stamp with a descriptive title.
-
Media Sources: Select your video/audio; enable "Capture Computer Audio" to play clips (e.g., YouTube).
-
Display: Toggle PowerPoint and Screen Capture as needed.
-
Live Stream: Select Webcast to generate a URL for off-site viewing.
-
- Record & Pause: Click Record to start; use Pause as needed during the lecture.
- Stop & Review: Click Stop when finished. Select Upload (or delete to record again).
- The Manage Recordings window will be highlighted, and it will take a few minutes for the recording to be uploaded and saved.
- Once uploaded, you will have options to view (playback), edit (the recording) and share (to users you haven’t already shared with). You will find tutorials on the Panopto website on how to edit and share your recordings.
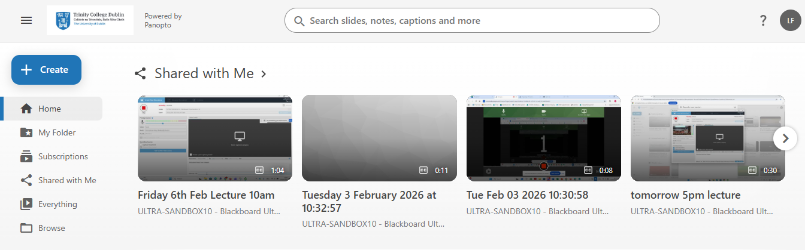
- You'll be able to see your uploaded lecture in the main TCD Panopto Cloud window, under your folder name, where you can edit the recording and more.
- Always log out of Panopto and the Windows desktop when finished to secure your account.