Staff Guide for Blackboard Ultra Base Navigation
This guide aims to walk you through Blackboard Ultra Base Navigation, so you are familiar with all its functions.
This page will give you an overview of the following steps:
-
-
-
-
-
-
-
-
-
-
-
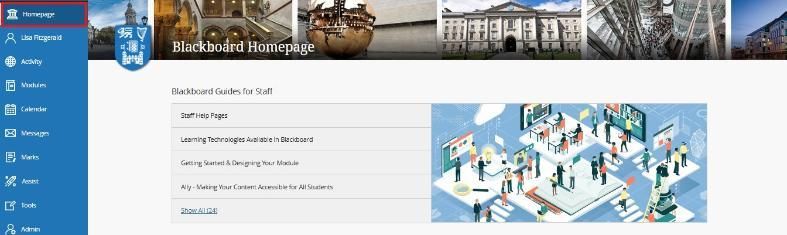
1. Homepage
The first thing you see when you log in to Blackboard is the Home page, which Blackboard calls the Institution page.
In this area, both staff and students will be able to find links to our Blackboard help pages and alerts/messages from Teaching & Learning IT, IT Services.
More Compact Navigation Items
The navigation menu has been adjusted to reduce item size, making the menu more compact.

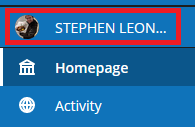
User Profile
Your user profile is now at the top of the navigation menu and will display your profile picture if you have added one.
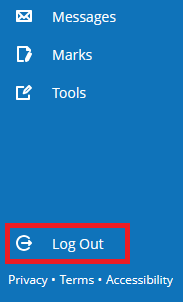
Log Out Button
The ‘Log Out’ option has been moved to the bottom of the navigation menu, separate from the other options.
2. Activity Stream
The Blackboard Ultra Activity Stream is a centralised feed that provides an up-to-the-minute list of all course activities, including new content, announcements, due dates, assignments, tests, and graded items. It helps you prioritise tasks and stay informed across all your modules.
The stream is a prioritised list of what's relevant to you. Use the stream to direct your attention to where your modules require it most.
- You can see how many submissions are ready to grade. You can also access new submissions from the stream.
- Receive reminders about personal events and meetings.
- Follow the latest posts on graded discussions as they happen.
- Filter your stream. Use the Filter menu and select Show All, Assignments and Tests, or Marks and Feedback.
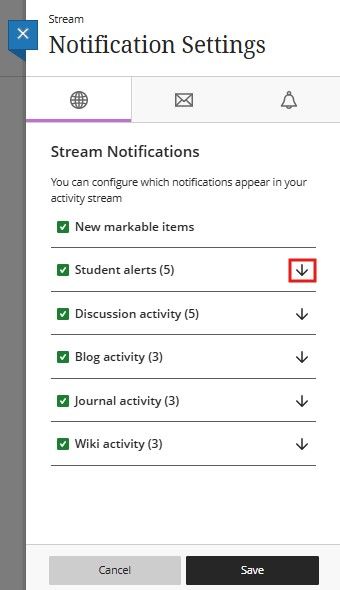
You can choose which notifications you receive about activity in all your Ultra modules:
- Stream notifications: Choose which activities appear on your Activity page.
- Email: To receive email notifications, add an email address to your profile page. Then, choose how often and which activities you want to receive notifications for.
- Push notifications: Messages pop up on your mobile device if you have the Blackboard app installed.
3. Viewing your Modules
After logging into Blackboard, you should see Modules on the left-hand side, located in the blue navigation menu.
Select Modules to view a list of your modules. You can view your modules in either a list or a grid format. To swap between the two views, select the list/grid icon at the top left. In the image below, the grid view is selected.

You also have the option to search, filter or display selected courses.

Quick Tip: Select the star icon on a module that you access regularly. The module will be placed at the top of the list with a purple star on the bottom right. You can unfavourite a course by selecting the star icon again.

Click to Learn more about Module Lists from Blackboard
4. Searching for your Modules
Click on Modules on the left-hand side of the blue menu.
- Click on Search your Modules if you know the module ID.
- Click on Filter to display Modules I teach - this refers to the modules where you are an instructor.
- Click on Terms and select 2025/26 to find all your modules for the Academic year 2025/26

Please note: Hiding a module hides it from your list, not from other users enrolled on the module. Modules that have been hidden from an instructor's module list will also be hidden in the Copy Items menu when copying (migrating) content from a module.
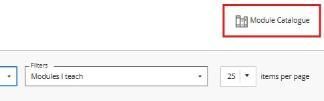
5. Module Catalogue
You can open and browse the module catalogue in the Ultra experience, located at the top right of your screen. Available modules in the Original Course View are listed in the module catalogue. Users can open the modules, view the content, and self-enrol if allowed.
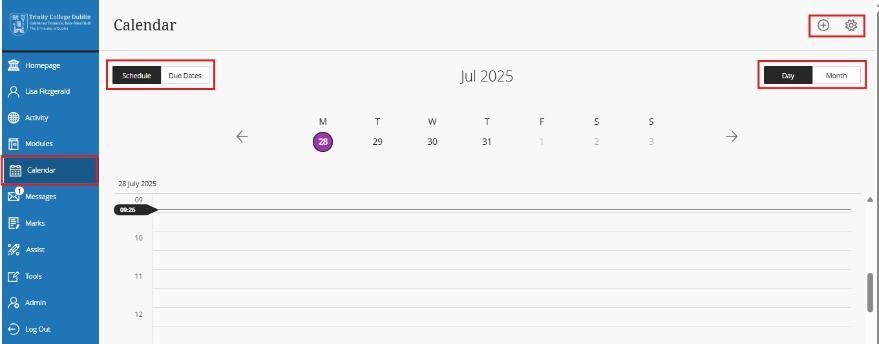
6. Calendar
The Calendar option on the left navigation is Blackboard Student Timetable, which provides students with a timetable calendar within Blackboard. Students can view the time, location, and lecturer for each of their classes.
The Blackboard timetable is updated daily. If students are unsure if the information is accurate, they should double-check it against their timetable, which is available in SITS. Please note that student timetables are subject to regular updates. Further details about student timetables can be obtained from each School Office. If you are in doubt about the accuracy of your student timetable, please check it on SITS.
You will find this information:
- Office hours, module schedule, and events: These appointments appear automatically on the calendar when you add them to a module.
- Due dates: When you create content with a due date, the dates appear automatically in the calendar.
When you access the calendar from within a course, it displays events specific to that module only. Select the Calendar tab from the navigation bar at the top of the modules.
Click to Learn more about Calendars from Blackboard
7. Messages for all your Modules
As an instructor, you can quickly send messages to all students about important deadlines and schedule changes.
A number count indicates the number of new messages received. When you select the Messages page on the base navigation, unread messages are indicated with a number within a purple circle. When you navigate away from this page, Messages on the left navigation displays the unread message count again. Modules with unread messages appear first on the Messages page.
Jump into your messages. Select a module card to view all new and existing messages in your course. You can delete messages inside your module.
Select the New Message icon beside your course on the Module page to send a message to one person, multiple people, a group, or a class. In the Ultra Module View, begin typing, and recipient names pop up.

Click to Learn more about Messages from Blackboard
8. Marks
This area provides access to the Gradebook for your modules and shows student submissions that require marking.
Click the assessment to go directly to its submission inbox.
Needs Marking: When an item in the Gradebook requires marking, it will be indicated by the number of assessments submitted and the number that still need to be marked.
When some students have not yet submitted, the Icon will appear in red. The number of missing submissions will be written in red.
View All Work: To view assessments that do not have any unmarked work, click on View All Work.

9. Updating your Profile
After logging in to Learn Ultra, you should see a link displaying your name on the left-hand side, located in the blue navigation menu.
Some fields are automatically populated from (SITS), so they can't be changed here. As a staff member or a student, you can change:
Watch a video about editing your profile.
Edit your profile shows how to update the information associated with your profile and add a profile picture.
Upload a profile picture.
You can save an image file to your profile. Other people see your image in messages, discussions, conversations, groups, and course listings.
- Hover over the generic silhouette of your image and select the pencil icon to upload, change, or remove an image.
- In the dashboard, select Upload a new profile picture to browse for the image on your computer. You can also drag a file into the Upload area.
- The image will be saved automatically. Close the panel to return to your profile.
Remove or replace your profile picture: Upload or drag another image to replace it.
To return to the generic silhouette, select the Delete this image icon to delete your current image file.
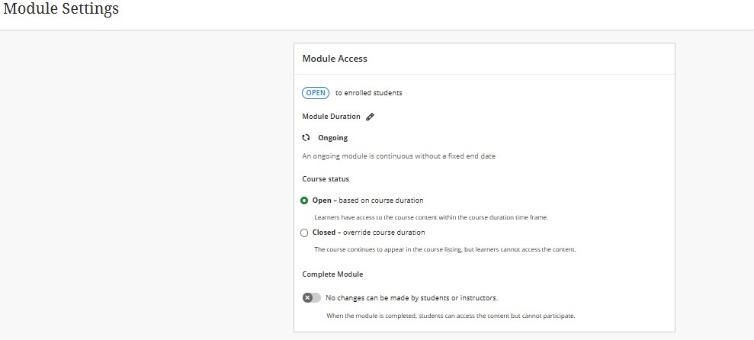
10. Complete / Closed Modules
Any modules listed here as Complete are not available to students. You can quickly make them available from this page.
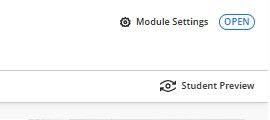
Finally, you can manage Module Availability access on the Module Settings page, ensuring the module is open to students. If not, click the settings cog and ensure this option is selected.
Other options within the Module settings include:
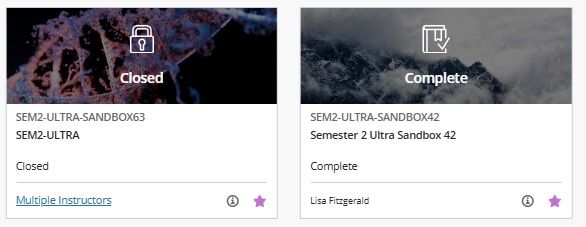
- Closed Module: When you set a module to closed, it remains in the module listing, but students cannot access it.
- Complete Module: Once a module is complete, students can access the content but cannot participate. Additionally, an Instructor can no longer make any changes to content once a module is marked as completed.
11. Navigating within Modules
There have been several changes to Blackboard modules aimed at reducing visual clutter and making it easier for staff and students to navigate between modules.
Full Screen Pages
Modules will now open in full-screen mode, so they no longer slide out from the right-hand side of the page.
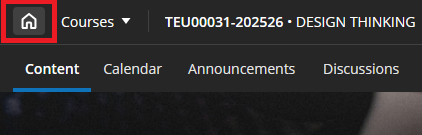
Replacement of X Button with Home Button
The blue X button previously located in the top-left corner of a module has been removed. It has been replaced with a Home button, which returns you to the Blackboard homepage.
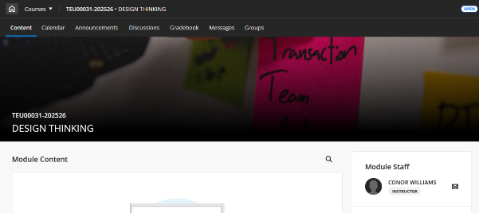
Updated Module Banner
The module banner now spans the full width of your screen. The name of your module and module ID can now also be found here.

Module ID and Name in Header
Your module’s ID and name are now found in the header bar of the module. Clicking them will return you to your module's main content page if you are currently in a different location.

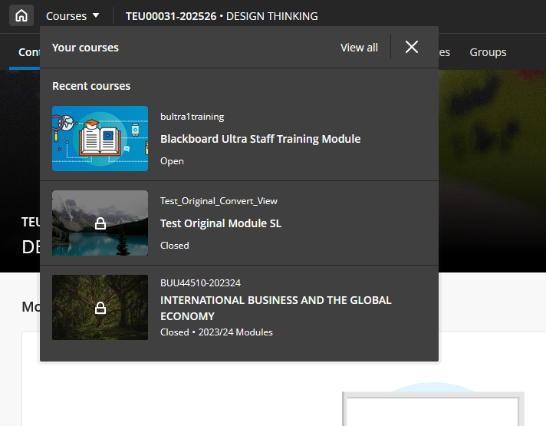
Module Switcher
A new Module Switcher is available at the top of a module page. It will allow you to quickly switch between modules you have recently been in or move back to your Module List.
Need Further Help?
Contact the IT Service Desk by one of the following methods.
You can email the service desk at itservicedesk@tcd.ie. Please ensure you fill in the 'Subject' field with Ultra: when emailing.
Email the Service Desk
Phone: +353 (01) 896 2000
Web Portal: assist.tcd.ie
Service desk opening hours are:
Monday - Friday: 09:00 - 17:00