Trinity staff computer accounts
Your Trinity Staff computer account, also known as your network login username and password, will allow you to access a host of services on the Trinity network.
All users of the Trinity network are bound by the IT and Cyber Security Policy. The main thing to remember is that you must never give your login details to anyone else - as you are responsible for actions carried out under your account.
Existing staff members
Obtaining your username and initial password
Any existing staff member can collect a printout of their username and initial network login password during standard opening hours from the IT Service Desk by presenting their staff ID card.
Please note that for security reasons usernames and passwords cannot be issued/confirmed by IT Service Desk personnel via phone or email.
Forgotten passwords
If you have forgotten your password, you can reset it via your Microsoft 365 account. See "Reset your work or school password using security info" for more details.
New staff members
Getting your username and initial password
Step 1: When you have returned all employment paperwork and it has been processed by Trinity's Human Resources (HR) department, step 2 begins.
Step 2: A file is sent from HR to IT Services with your employment information (Name, Department, Job title). This file is processed into our systems overnight and the information is fed back to HR.
Step 3: On your first day at work, email the HR Service Centre (hr@tcd.ie) to request your computer account username and initial password.
Set up your Trinity computer account
Enable Multi-Factor Authentication (MFA) with Microsoft 365
When you log in for the first time, to a Microsoft 365 authenticated service (such a office.tcd.ie), using your username and password, you will be requested to set up your Multi-Factor Authentication (MFA).
Failure to set up MFA within the first 30 days of the account creation will result in the account automatically disabling.
The MFA setup process begins when you sign into Microsoft 365 for the first time.
- Sign in to office.tcd.ie (Microsoft 365), using your Trinity email address (in the form username@tcd.ie) and password
- You will see a prompt asking you to keep you account secure. Click on Next
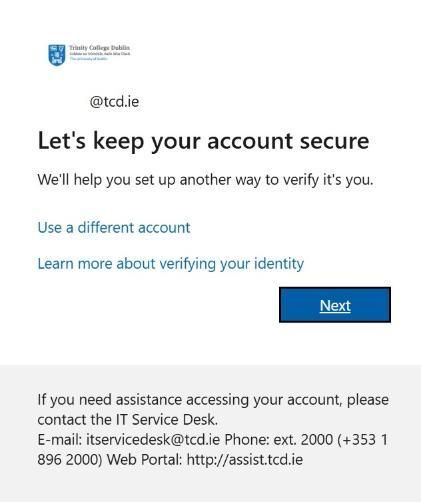
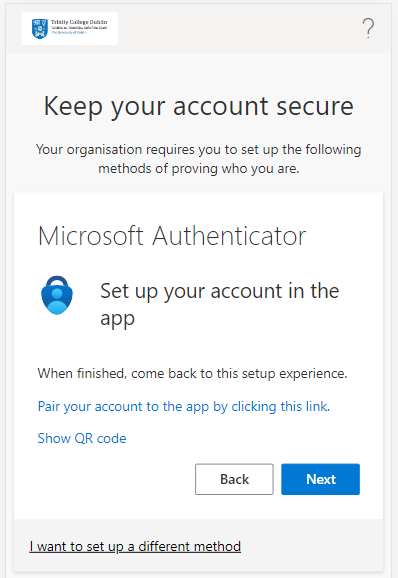
- You will then be presented with the Keep your account secure screen.

Your options are to verify your account via the Microsoft Authenticator app or via a Phone. Depending on the method you choose, and the devices you are using, the next steps will differ.
If you are using only a phone to complete the setup, you can complete the verification process by one of the following methods:
- Microsoft Authenticator App (Pairing)
- Phone Text Code
If you are completing the setup on a computer and also have a phone with you, you can complete the verification process by one of the following methods:
- Microsoft Authenticator App (QR Code)
- Phone Text Code
Select the appropriate tab below for the next steps.
MFA authentication options
- On your phone, install the Microsoft Authenticator app
- After you install the Microsoft Authenticator app on your phone, switch back to your phone browser and click Next

- Click Pair your account to the app by clicking this link
- After clicking the 'Pair your account' link, you will get a prompt saying 'Open in "Authenticator"?'. Click Open to continue
- You may have to enter your phone pin code multiple times from this point onwards
- The 'Account added successfully' message will be displayed and the email account name will show in your Microsoft Authenticator App. Return to your browser window and click Next
- Microsoft will then display a number on the browser screen

- Switch back to the Microsoft Authenticator app and enter the number followed by Yes

- Once you see the Notification approved message appear in the browser, click Next

- To complete the Two Step Sign-In setup, click Done

- On your phone, install the Microsoft Authenticator app
- After you install the Microsoft Authenticator app on your phone, on your computer choose Next
- Click Next again

- Once the Scan the QR code screen appears on the computer, open the Microsoft Authenticator app on the phone and follow the steps below:
- Open the Microsoft Authenticator app, tap the + in the top right corner and choose Work or school account
- Select Scan a QR code and point the mobile device camera at the QR code on the computer screen

- iOS users may have to enable the camera in Settings to scan the code
- If you can't use the phone camera, you can manually enter a code on the app by clicking on the Or enter code manually button. The code and URL needed can be found by clicking on the Can’t Scan Image? button below the QR code on the computer
- You will then see a notification to say the account is added to the app
- Switch back to the computer and click Next

- Microsoft will then display a number on the computer screen as well as send a notification to the Microsoft Authenticator app on the phone

- Enter the number you see on the computer in the Microsoft Authenticator app. Once you enter the number, click Yes
- You may have to enter your phone pin code multiple times as part of this process
- You may have to enter your phone pin code multiple times as part of this process
- Once you see the Notification approved message appear on the computer, click Next
- To complete the Two Step Sign-In setup, click Done
- To verify via a phone text code, click I want to set up a different method

- Select Phone from the dropdown and click Confirm

- You will then see the below screen

- Select your country code and enter your mobile number
- Choose, either Text me a code or Call me. We recommend the Text me a code option
- Click on Next
- You will now receive a code via text message from Microsoft. Enter the code in the box and click Next

- If you chose, Call me, rather than Text me a code, you will receive an automated call from Microsoft. During the call you will be prompted to press a key on the keypad to progress
- Once the code is verified, you will see a message to say the phone was registered successfully. Click Next

- To complete the Two Step Sign-In setup, click Done

Changing your initial password
IT Services recommend changing your initial password as soon as you have MFA set up.
Your password can be changed via your Microsoft 365 account. See "Change your work or school account password using security info" for more details.
If you fail to change your password within 30 days of receiving the new account, then you will be forced to change it.
After you change your initial password, you will be required to change it every 180 days after that point.
Please note, your password can only be changed once in any 24-hour period.